Workflow Builder Overview
Wooxy Workflows help you to build dynamic, automated marketing communication paths for your contacts. Create a Workflow with Multivariate Split blocks, branches, and individual actions, so each of your contacts has a personalized experience.
In this article, you’ll learn about Workflow Builder and how to use it.
An automated route that consists of different interactions a contact will trigger as they move through it, carving out their unique path (based on what they do or don’t do along the way).
Before You Start
- Depending on your plan, you may have limited access to Customer Workflow tools. To learn more, check out our pricing page.
- This article is about Customer Journey automation. To learn more about other email automation tools, read About Classic Automation.
Create a Workflow
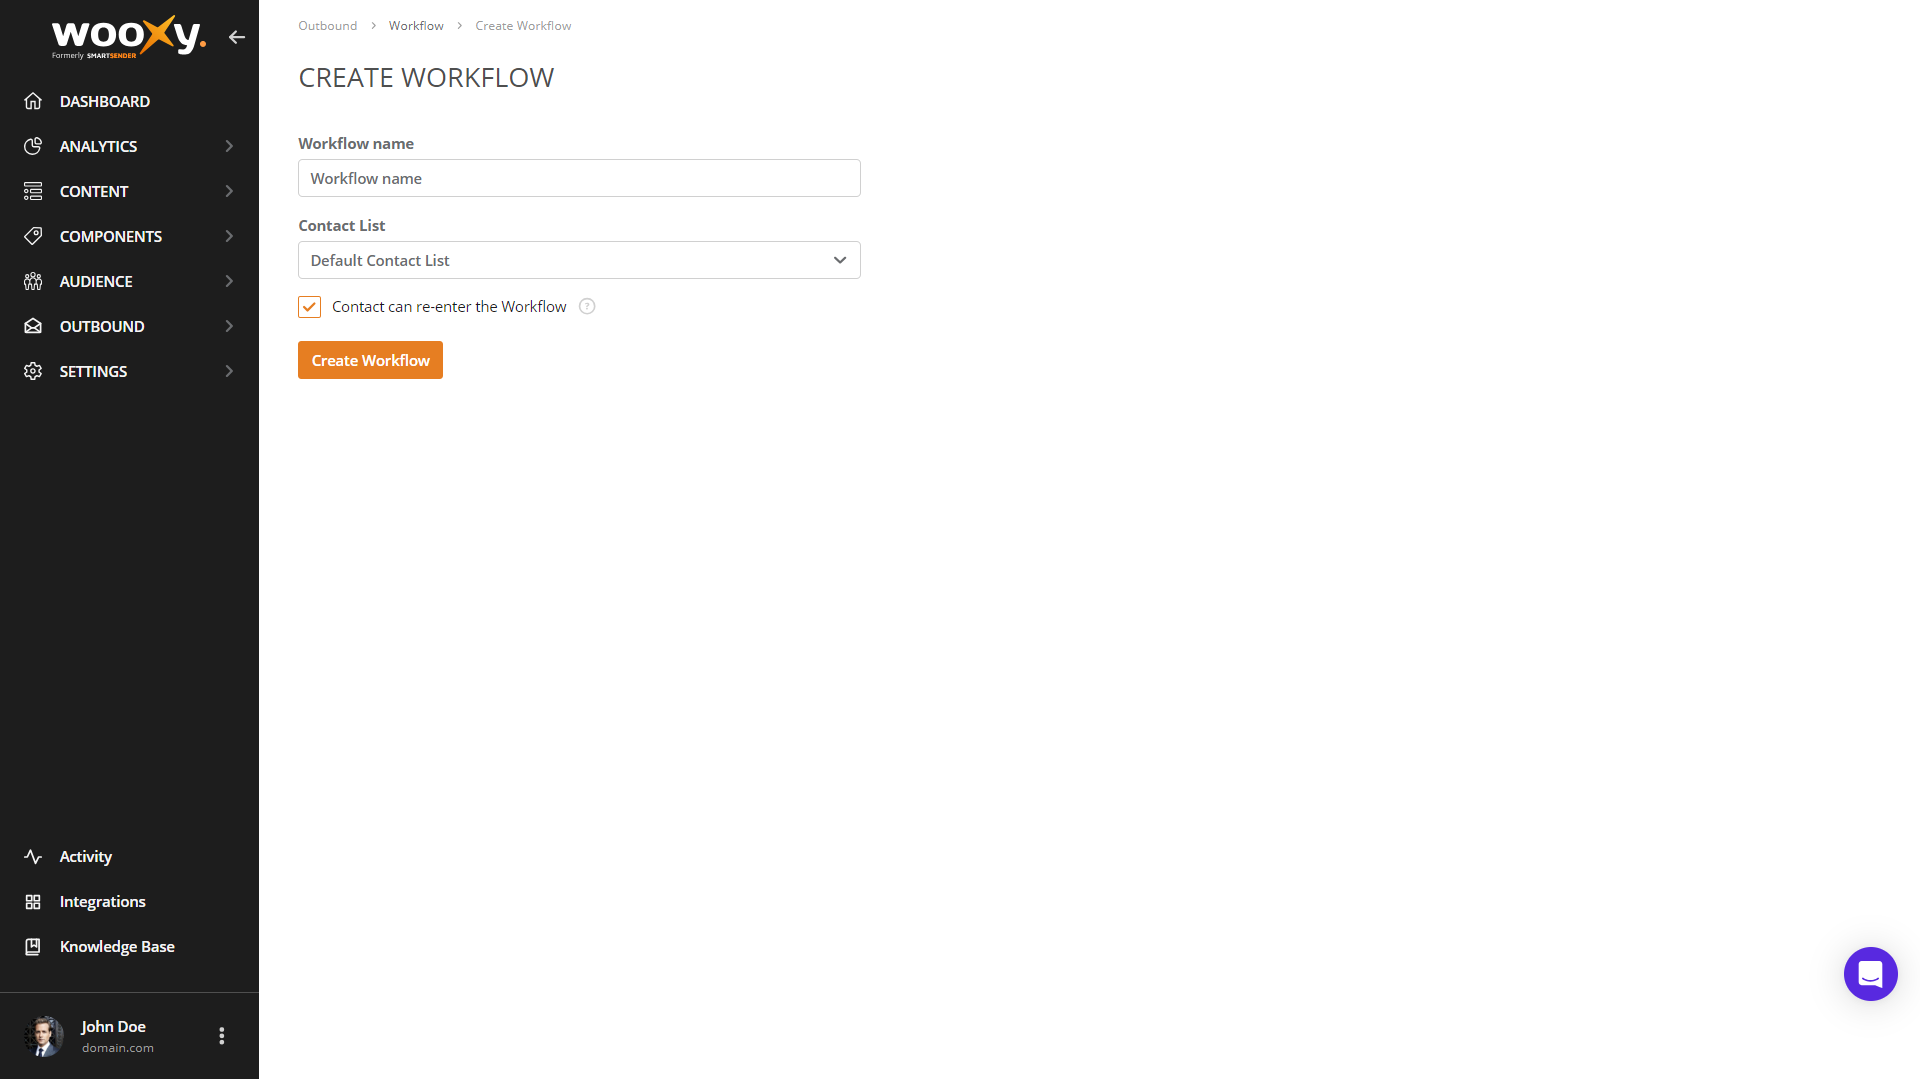
To create a Workflow, follow these steps.
Navigate to Workflows page (Menu -> Automation-> Workflows).
Click the “Add” button.
Enter a name for your Workflow, then click the drop-down menu to choose a contact list.
Select the checkbox if you want to allow customers to be added to this Workflow multiple times.
- If the checkbox is not selected, the contact will be added to this Workflow only one time.
- If the contact is removed from the contact list and added again, it will be considered a new contact and can be added to the Workflow again upon a trigger.
Click the “Create Workflow” button.
Now that you’ve created a Workflow, you can add starting trigger, actions, and conditions that will determine each contact’s path. To do this, you’ll plot these blocks on a Workflow. This Workflow will help you visualize how contacts move along different paths.
How are Automations structured?
You can sketch Workflows by connecting three types of building blocks:
| Component | Description |
| Triggers | Spark the process. |
| Conditions | Allow you to focus actions on specific users. |
| Actions | What actually happens when the process is sparked. |
All the actions and conditions you can use are in the side panel in the Workflow builder. To show/hide the side panel, click on the menu icon next to the logo.
How to build action Workflows?
IMPORTANT: Workflows always start with a trigger. Each Workflow can have up only one starting block.
For example:
Trigger event: “Contact added to Contact List”. INFO: Specify which contact list you want to use automation.
Action: Automatically send a welcome email template “Hi great fan! A special offer for you today!”.
Triggers
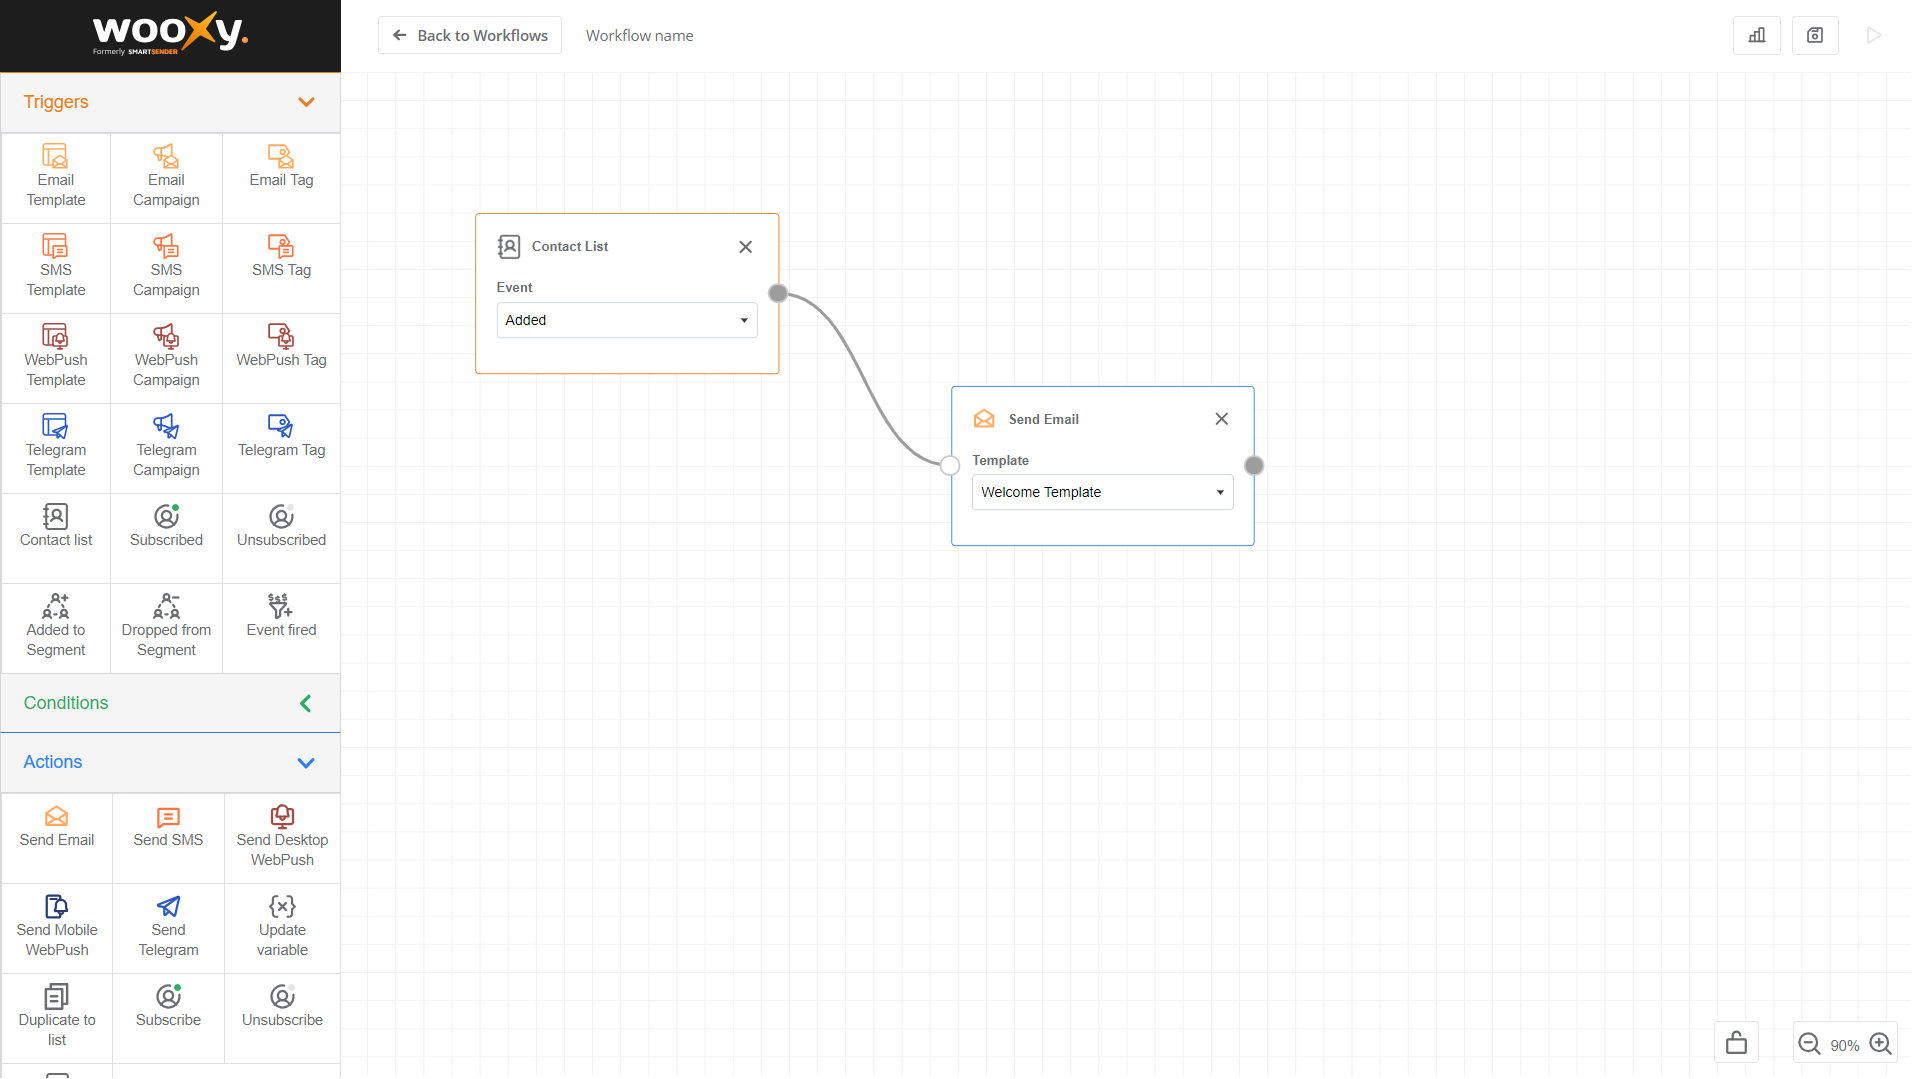
To add your Trigger blocks, follow these steps.
Expand the Triggers tab.
Choose the starting trigger you want and drag & drop at the workspace.
Choose the specific settings for your starting trigger.
After you added the starting trigger, you’ll start adding new rules and actions that make up your Workflow. Then, try any combination of Workflow blocks to create a unique customer workflow that meets your marketing needs.
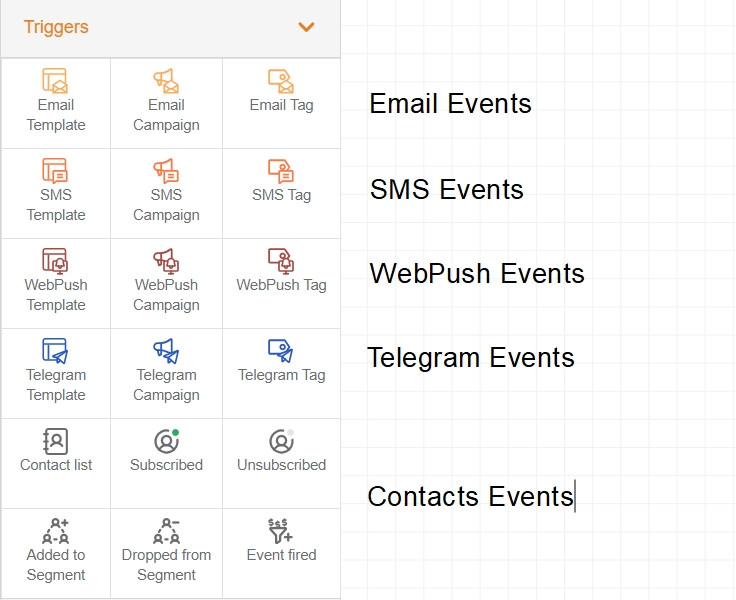
Email Events
INFO: An event that happened or not happened with your email message sent via Wooxy.
| Event source | Description |
| Email Template | The message was sent using a specific template saved in the admin panel. It is required to select a specific Template from the provided list. |
| Email Campaign | The message was sent as a one-time promo Campaign saved in the admin panel. It is required to select a specific Campaign from the provided list. |
| Email Tag | The message was tagged with a specific tag saved in the admin panel. It is required to select a specific Tag from the provided list. |
SMS Events
INFO: An event that happened or not happened with your SMS message sent via Wooxy.
| Event source | Description |
| Sms Template | The message was sent using a specific template saved in the admin panel. It is required to select a specific Template from the provided list. |
| Sms Campaign | The message was sent as a one-time promo Campaign saved in the admin panel. It is required to select a specific Campaign from the provided list. |
| Sms Tag | The message was tagged with a specific tag saved in the admin panel. Required to select a specific Tag from the provided list. |
WebPush Events
INFO: An event that happened or not happened with your WebPush notifications sent via Wooxy.
| Event source | Description |
| WebPush Template | The notification was sent using a specific template saved in the admin panel. It is required to select a specific Template from the provided list. |
| WebPush Campaign | The notification was sent as a one-time promo Campaign saved in the admin panel. It is required to select a specific Campaign from the provided list. |
| WebPush Tag | The notification was Tagged with a specific tag saved in the admin panel. Required to select a specific Tag from the provided list. |
Telegram Events
INFO: An event that happened or not happened with your Telegram message sent via Wooxy.
| Event source | Description |
| Telegram Template | The message was sent using a specific template saved in the admin panel. It is required to select a specific Template from the provided list. |
| Telegram Campaign | The message was sent as a one-time promo Campaign saved in the admin panel. It is required to select a specific Campaign from the provided list. |
| Telegram Tag | The message was tagged with a specific tag saved in the admin panel. Required to select a specific Tag from the provided list. |
Contacts Events
| Event source | Description |
| Contact List | Contact was added to the target Contact List via API, manually from admin panel, import file, or by other Trigger. |
| Subscribed | Contact subscribed to a specific channel in the target Contact List via API, manually from admin panel, imported file, or by other Trigger. |
| Unsubscribed | Contact unsubscribed from a specific channel in the target Contact List via unsubscribe link, API, manually from admin panel, imported file, or by other Trigger. |
| Added to segment | Contact was added to the target Segment after update of a variable via API, manually from admin panel, imported file, or by other Trigger. |
| Dropped from segment | Contact was dropped from the target Segment after update of a variable via API, manually from admin panel, imported file, or by other Trigger. |
Conditions
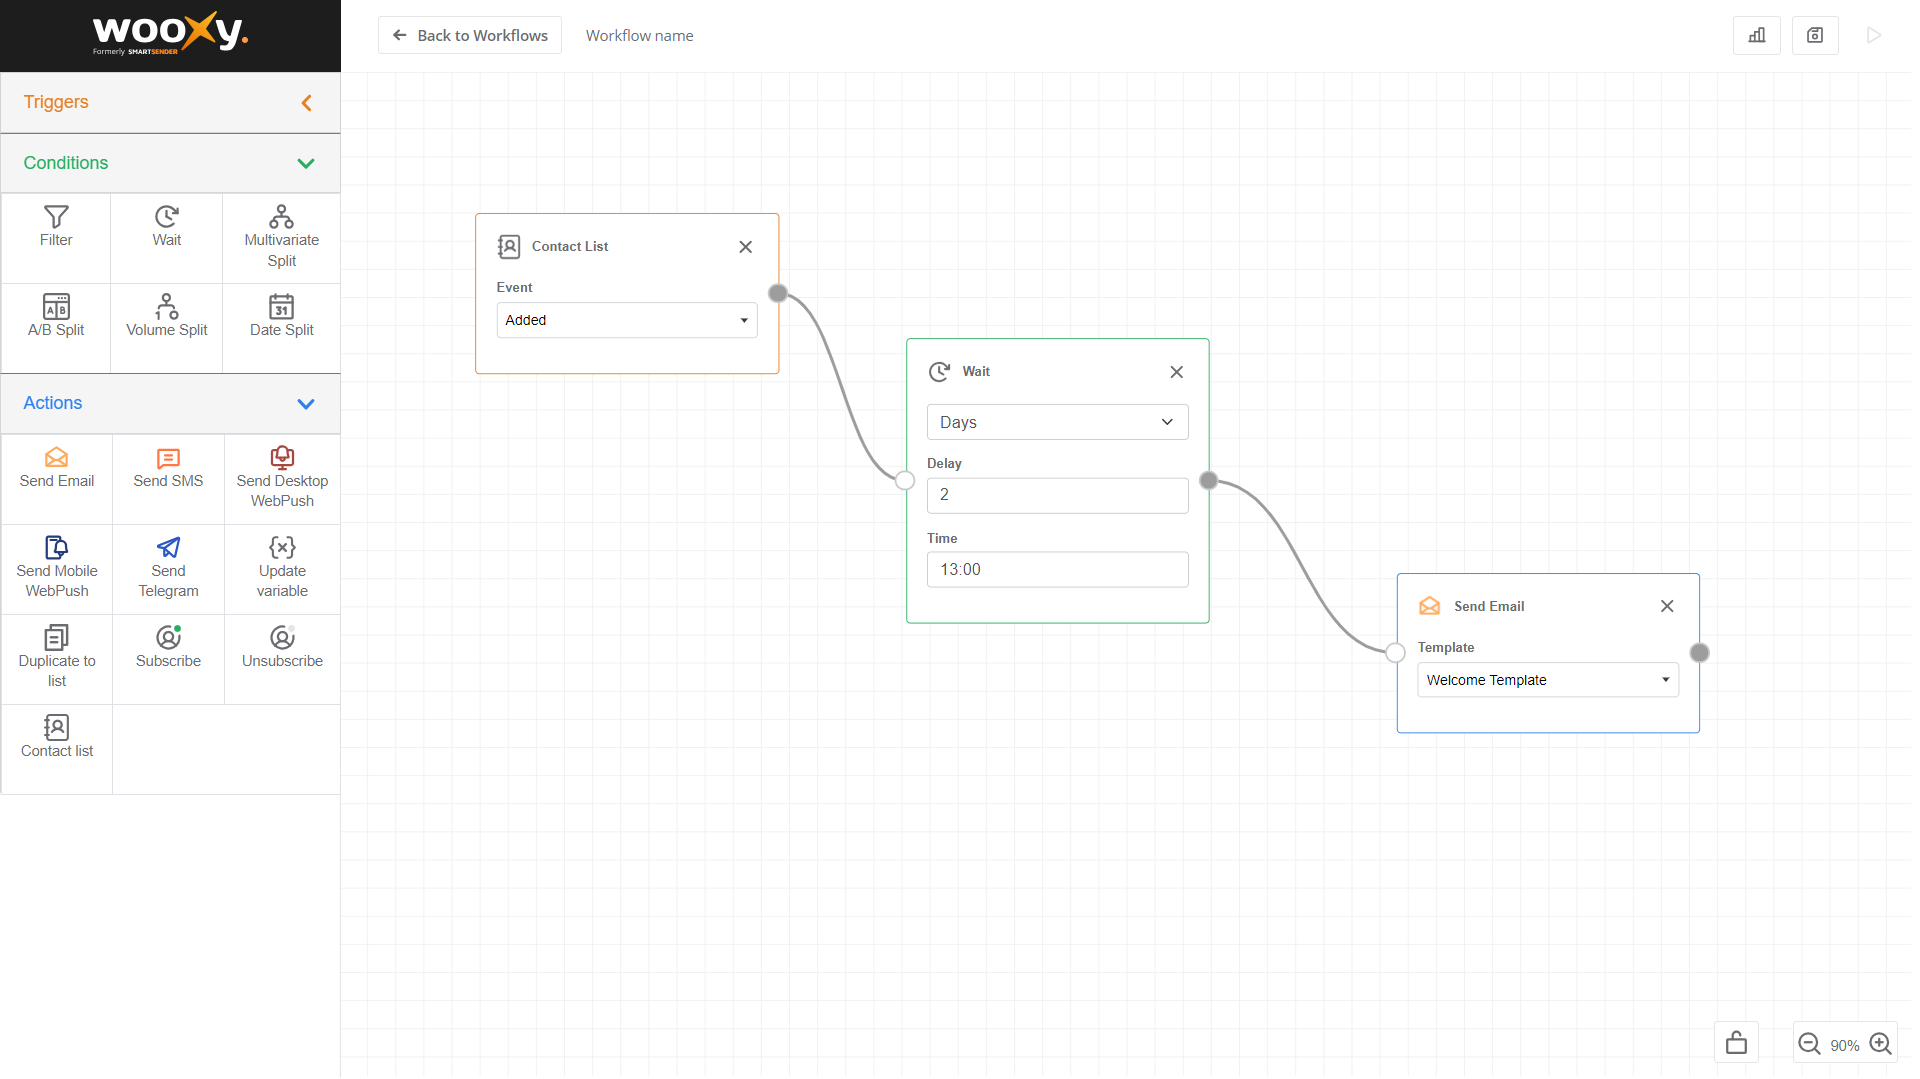
To add your Condition blocks, follow these steps.
Expand the Conditions tab.
Choose the condition you want and drag & drop at the workspace.
Choose the specific condition configuration.
Conditions are a type of Workflow block that defines how, when and which contact moves along a set path.
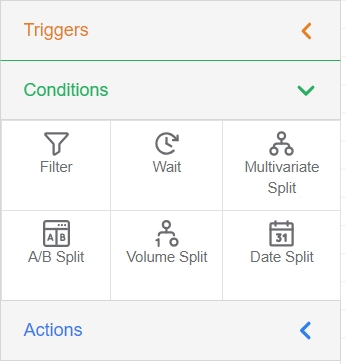
Filter
Here you can filter contacts based on a single condition or combine multiple conditions. Every contact will be checked according to configured criteria with TRUE if there is a match or FALSE if there is no match result and exit from the corresponding point. In other words, your contacts will be split based on matching to provided criteria.
For example: After the contact got an Email message, wait for one day, check if users have opened the message:
If
True, send contact down the path A.If False, send contact down the path B.
Find more detailed information regarding available filter options here.
Wait
Here you specify the delay of a specific timeframe before the contact can go to the next block in the Workflow.
Please consider the following when using the Wait condition:
INFO: All delays specified in days are counted as calendar days, not 24-hour units.
INFO: If you specify ‘Wait one day and send at 07:00’, the Workflow will collect content between 00:00 and 23:59:59, which is then sent out at 07:00 the next day.
INFO: Calendar days are counted according to the default timezone of the account.
| Wait option | Description |
| Minutes | Configure how many minutes after the moment contact reaches the Wait block to delay before going to the next block. |
| Hours | Configure how many hours after the moment contact reaches the Wait block to delay before going to the next block. |
| Days | Configure how many days and till what time after the moment contact reaches the Wait block to delay before going to the next block. |
| Day of week | Configure what day of week and till what time after the moment contact reaches the Wait block to delay before going to the next block.
|
Split
With Split testing you can test directing your contacts via different engagement paths with the ultimate goal of working out which variation of the journey garners the best results.
With Wooxy, you can split any marketing variables: subject lines, From name, content, send time, communication channel, content-language, colors, visuals, etc.
| Split option | Description |
| A/B Split | You can split the contacts into two paths, randomly assigned configured percent of contacts to each path. |
| Volume Split | You can split the contacts into two paths, randomly assigned configured number of contacts to path A, and send the rest of the contacts to path B. |
| Date Split | You can split the contacts into two paths, randomly assigned contacts to path A if they reached the split block at a specific date, and send the contacts to path B if they reached the block on other days. |
| Multivariate Split | You can randomly assign your contacts to as many paths as you need. Contacts will be distributed evenly between all variations. |
Actions
To add your Action blocks, follow these steps.
Expand the Actions tab.
Choose the action you want and drag & drop at the workspace.
Choose the specific action configuration.
Actions are a type of Workflow block that tells our system to perform a specific task, like send an email message or update variable, when the contact reaches it in their journey.
After you configure your Workflow and activate it, any contact who matches a starting block requirements will be added to the Workflow.
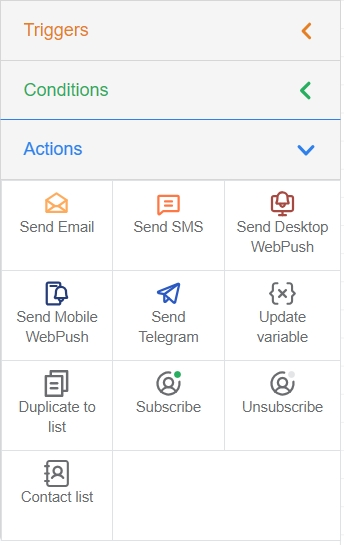
Send Actions
An event that can happen with an email address in one of your Contact Lists in Wooxy.
| Actions | Description |
| Send Email | The selected email template will be sent to the contact if the contact has an email address in the target Contact List. |
| Send SMS | The selected SMS template will be sent to the contact if the user has a phone number in the target Contact List. |
| Send Desktop WebPush | The selected Desktop Web Push template will be sent to the contact if the user has Desktop WebPush subscription in the target Contact List. |
| Send Mobile WebPush | The selected Mobile Web Push template will be sent to the contact if the user has Desktop WebPush subscription in the target Contact List. |
| Send Telegram | The selected Telegram template will be sent to the contact if the user has Desktop WebPush subscription in the target Contact List. |
Contacts Actions
An event that can happen with an email address in one of your Contact Lists in Wooxy.
| Actions | Description |
| Update Variables | The target variable will be updated with a new value provided in the configuration. Please note that such updates can change the contact segment and activate other Triggers. |
| Subscribe | The contact will be subscribed to the selected communication channel. |
| Unsubscribe | The contact will be unsubscribed from the selected communication channel. |
| Duplicate to List | The contact will be duplicated with all its variables to selected the Contact List. |
IMPORTANT:
- Workflow always starts with a single trigger.
- You can add triggers only after actions.
- You can add multiple actions after one trigger or condition.
- You can connect the exit point from one block to any other entry point. You can easily loop blocks, so please plan your workflow carefully.


