Sending Domain Setup
In the dynamic landscape of digital communication, crafting effective Сampaigns goes beyond compelling content and eye-catching designs. The foundation of a successful email strategy lies in the proper setup of your sending domain.
Sending domain setup is a crucial step for the outbound sendings in Wooxy. If you currently don’t have your own email domain or access to your organization’s domain, we encourage you to register one. Please note that sending messages and accessing most sections of the platform is not available until you verify your domain.
Let’s dive into the key elements of configuring your sending domain for optimal email delivery and engagement.
The domain in the Wooxy system can be set in two ways:
by verifying the business email address through email confirmation
by verifying the domain by installing DNS records.
Business email address – is an email address that is associated with your business or organization.
Domain (domain name) is a human-readable address that is used to identify a specific location on the internet. For example, “example.com” is a domain name. In the context of DNS (Domain Name System), you may need to add CNAME (Canonical Name) records for your domain to complete a verification process.
DNS (Domain Name System) records – components that are responsible for translating human-readable domain names into IP addresses that computers use to identify each other on the network. To complete the verification process when choosing the “domain verification via adding DNS records” method, adding DNS CNAME records is required.
Below, you can find step-by-step instructions on how to set up your domain properly.
Things to know before you start:
- Use a domain you plan to verify and send messages.
- Subdomains are also allowed.
- Domains from free email providers are not recommended.
- You cannot add the domain that already exists in the Wooxy system.
- You need to have access to your website hosting or domain registration account to validate your domain via adding DNS records.
- A domain verified via a business email address can also be verified by adding DNS records.
- A domain verified by adding DNS records at least once does not need verification through the business email address.
- In case you verify the domain via a business email address, the address will be set as “From email” for all your Contact Lists. This email address cannot be changed. The root domain name of that email address will be defined as the “From name” for all Contact Lists you process.
- In case you verify your domain via DNS records, you can change the username of the “From email” field in all Contact Lists after the domain verification is done. The root domain name will be defined as the “From name” for all Contact Lists you process.
- Once the domain is already verified – please do not press the “Check DNS Records” button. It may cause unnecessary damages to your records.
Add a new domain to the Wooxy admin panel
Add as many domains as you need for your business. Follow the simple steps below. If you have any difficulties, just contact our support team via support@wooxy.com, and we will help you with this process.
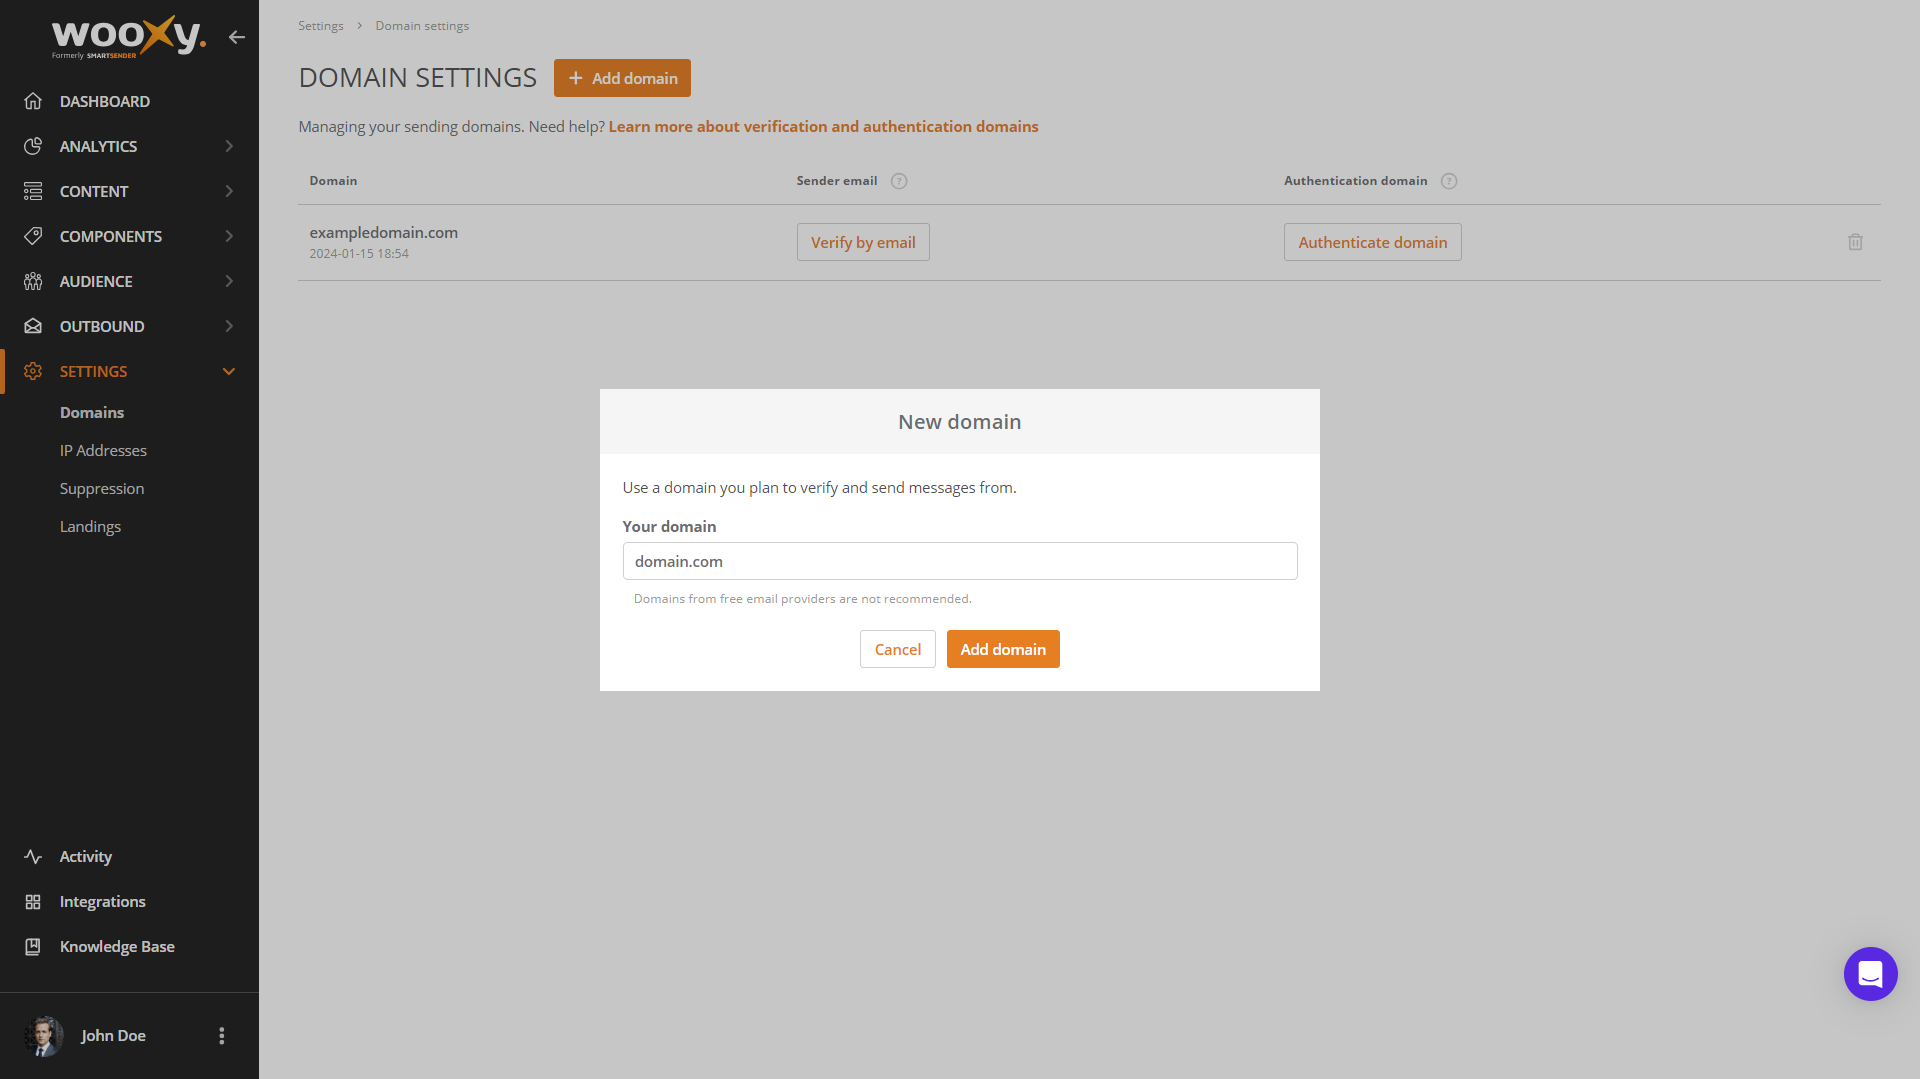
Step-by-step instructions:
Navigate to the Domains management page (Menu->Settings->Domains).
Press the “Add domain” button.
Type in your domain on the popup window.
Press the “Add domain” button.
Verify your domain using one of the available methods: via the business email address or by adding DNS records.
These processes are the same as when you verify the domain for the first time during the onboarding.
The Sender Email verification
You may verify your domain via your business email address.
This method becomes handy if you temporarily or constantly do not have access to your website hosting or domain registration account, preventing you from validating your domain through the typical means of adding DNS records.
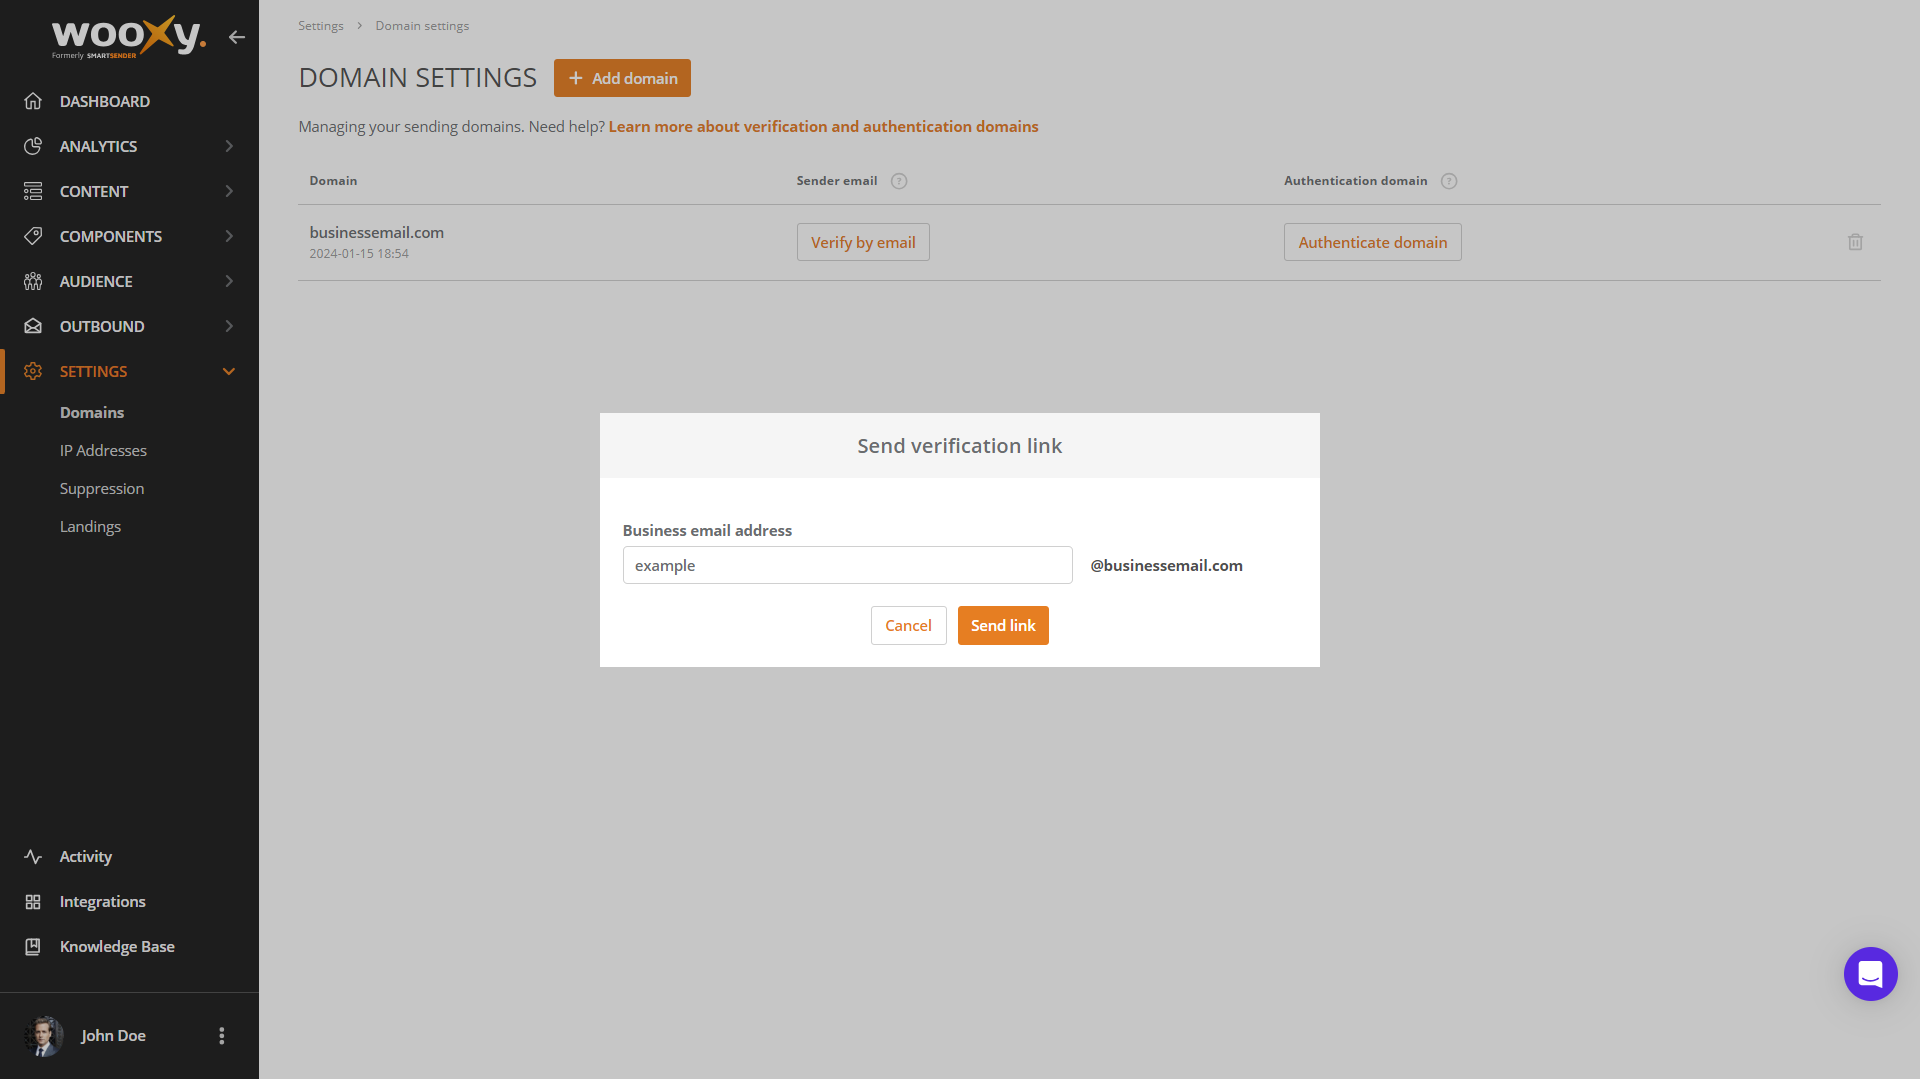
Step-by-step instructions:
Tap the “Verify by email” button next to the domain name you want to verify.
Type in your business email address.
Tap the “Send link” button.
Check your inbox. You will get an email with the verification link.
Open the email and click the verification link to confirm domain ownership.
Verification process details:
After you enter your business email and click the “Send link” button, the system automatically sends you an email with a verification link.
Check your mailbox, click the link, and you’ll be one step closer to unlocking all we have to offer.
As soon as your sender email has been verified successfully, you can start sending. IMPORTANT: We strongly recommend authenticating your sending domains by adding DNS records to maximize deliverability.
If you didn’t get an email with the verification link, repeat the process to receive a new email to complete the verification.
This email address will be set as the “From email” address that will be used for sending messages. You cannot change it once the verification process is completed. The root domain name will be defined as the “From name” for all Contact Lists you process.
You can additionally verify the domain by adding the DNS records – it will ensure better deliverability and enable the username to be changed in the “From email” field for all Contact Lists.
The Sending Domain Verification
This method is the recommended way for verifying the sending domain. Authentication is critical to the delivery of your Campaigns. Use a domain you want to verify and from which you want to send emails.
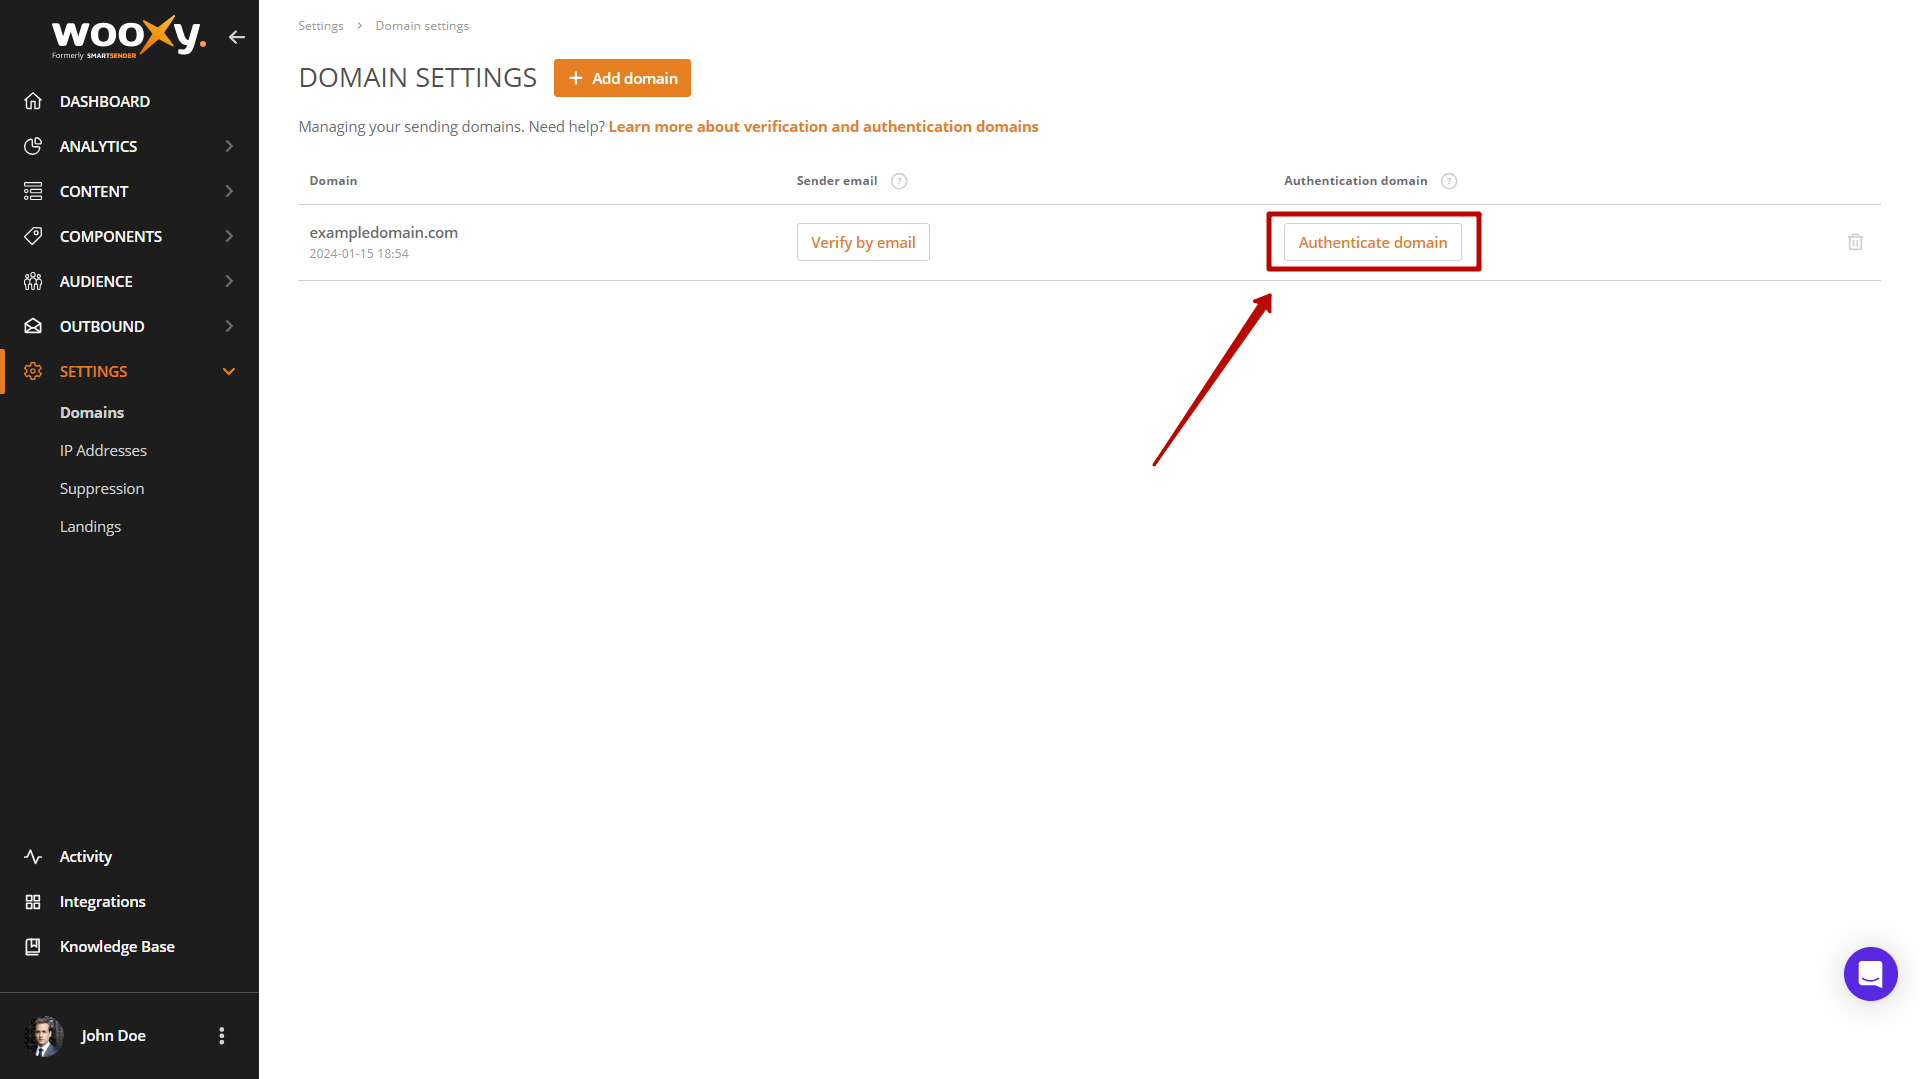
Step-by-step instructions:
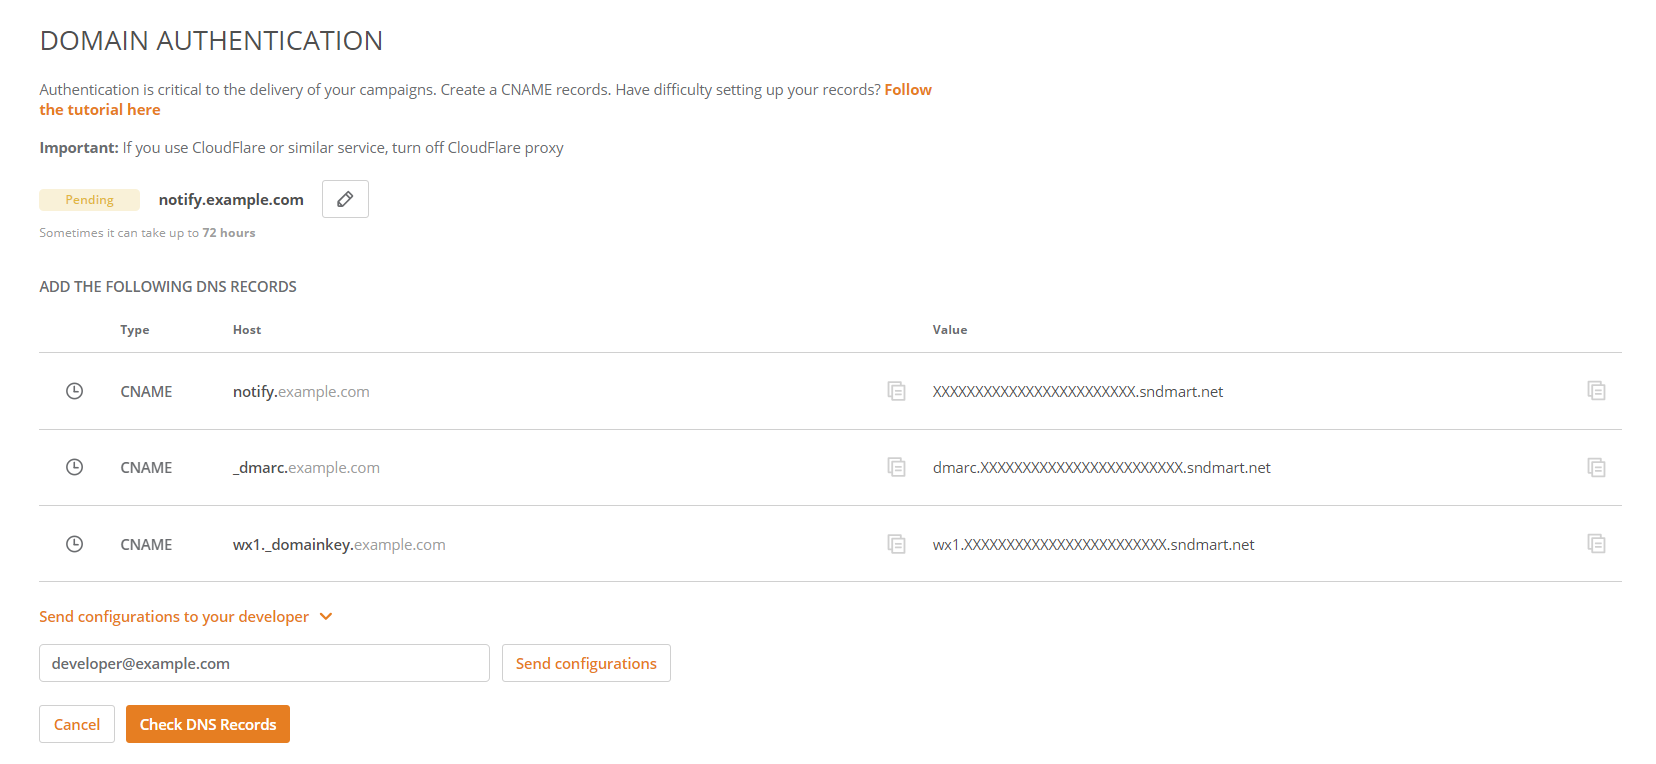
Tap the “Authenticate domain” button next to the domain name you want to verify.
Copy the generated CNAME records.
Add CNAME records on your side in the service you use (for example, Cloudflare).
Go back to the Domain Settings page at your Wooxy account.
Click the “Check DNS Records” button.
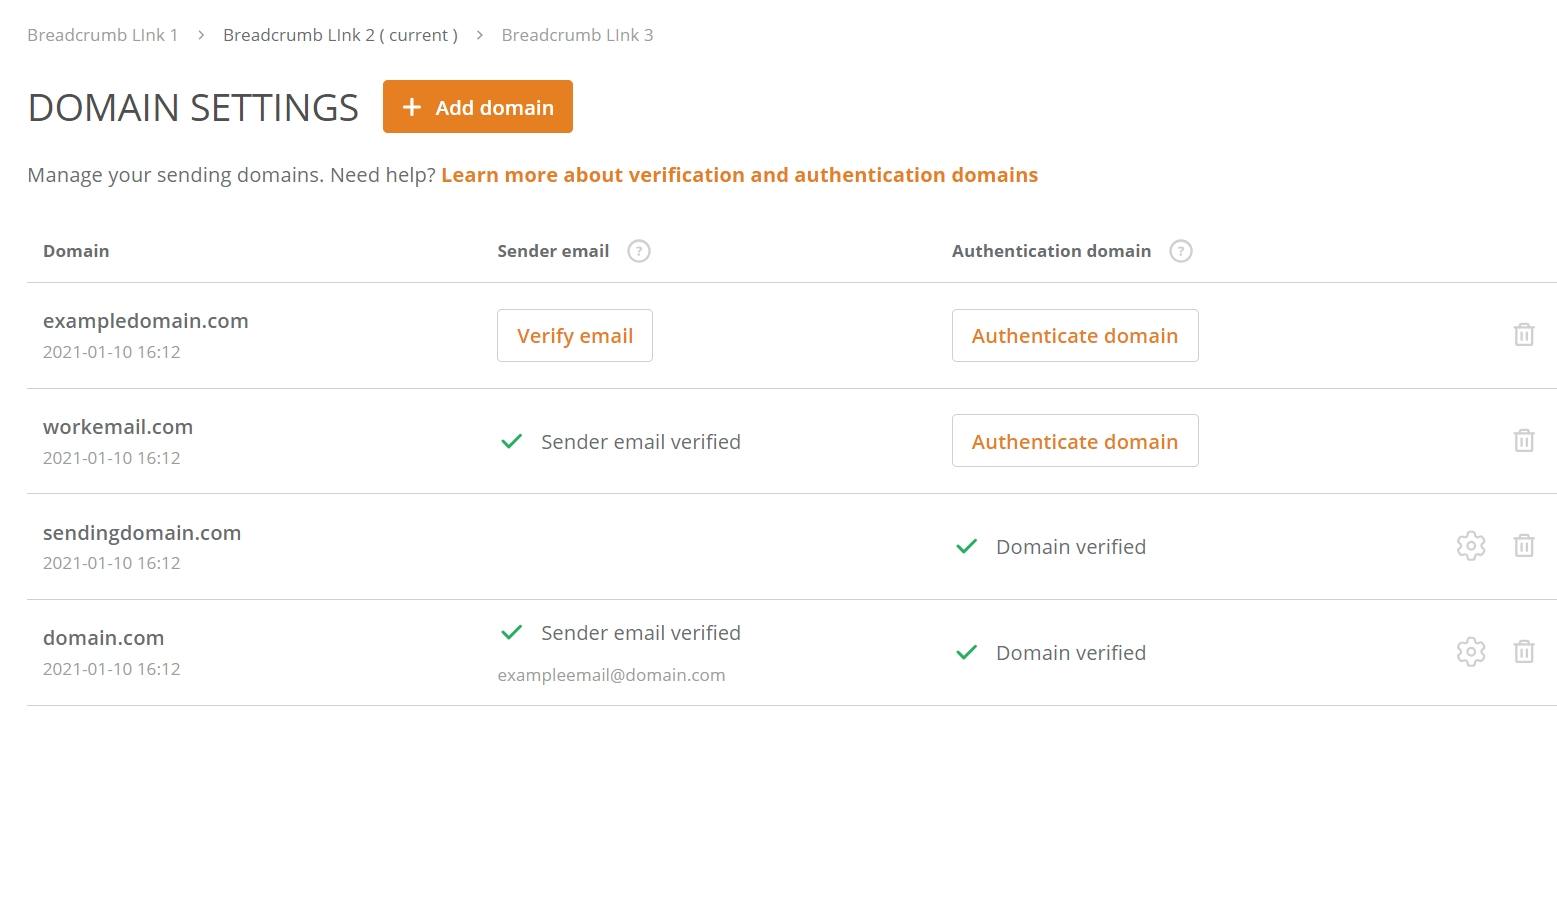
The status is displayed as “Verified” when the domain verification process is completed.
Verification process details:
You need to add three DNS CNAME records listed in the table in the service you use (Cloudflare or another one). IMPORTANT: Turn off the proxy in the service you use.
You can send the DNS configuration to your developer in case you currently do not have necessary access or cannot add the records by yourself for any other reason.
We need a subdomain for maintaining technical settings. So, the platform will generate a subdomain by default. You may change the domain prefix you want to delegate to us before your domain verification. NOTE: Frequent changes may affect DNS settings and domain reputation.
When you click the “Check DNS Records” button after DNS records are added from your side, the “Pending” status appears. It means the verification is in process, and the domain name is not verified yet. This process can take up to 72 hours.
When the status turns to “Verified,” it means that all three records were found, and the domain is successfully verified.
Watch the video instructions – that may help you verify your domain in the Wooxy system correctly.
NOTE: Your domain will start running in the warm-up mode. There is an automatically enabled IP warm-up mechanism on your account in order to protect your domain and our servers. This is standard procedure for all new active accounts.
Remember that during domain warming-up, avoiding aggressive email marketing tactics and excessive email sending is crucial. Gradually increase your email sending volume and engagement to build a positive sender reputation. Focus on delivering valuable content to your recipients and encouraging genuine interactions.
We recommend you be careful during the warm-up process because Email Service Providers (ESPs) may start to place your emails into the “Spam” folder or even block the domain if the message volume spikes or decreases.
Check out the warm-up mode process details here.
Domain authentication serves as a method to confirm your identity, allowing the recipient server to ascertain the credibility of the sender, whether an individual or an organization. Through domain authentication, you incorporate digital “signatures” into your emails, functioning as a form of authentication stamp. This process is crucial for establishing trust, ensuring that your emails originate from a reliable source, and safeguarding recipients’ inboxes against phishing or deceitful messages.
Shortlink Setup
At Wooxy , we have created a link shortener tool. To use it, you need only pick a domain, add a specific record to your DNS settings, and contact us at support@wooxy.com for further assistance.
Tip: We recommend using a separate short domain for the link shortener. You'll need to add a particular record to this domain.
Step-by-step instructions:
Copy the required CNAME record.
Add the CNAME record on your end in the service you use (e.g., Cloudflare).
Then, contact us at support@wooxy.com so we can complete the setup on our end.
Once the setup is complete, we also recommend sending a test communication to ensure everything works correctly.
Verification Process Details
You need to add the CNAME DNS record listed in the table below in the service you use (Cloudflare or another).
You can send the DNS configuration to your developer if you don’t have the necessary access at the moment or cannot add the records yourself for any other reason.
Once all steps are completed, contact us and provide the domain for which you added the record. We will complete the setup, and the link shortener feature will work for your links.
Record for configuring the shortlink that needs to be added.
| Type | CNAME | Record type of required record. |
| Name | {{yourShortDomain}} (for example: shortDomain.example) | Record Name (you need to use the record of your short domain or subdomain) |
| Value | clc.so | Our short domain used for the link shortener, which serves as the value for the DNS record. |
Note: Once you've set up the link shortener, all your links (mainly those in SMS messages) will use the HTTP protocol. Today, more and more providers are starting to block HTTP links and flag them as unsafe. In our recent articles, we have disclosed the importance of HTTPS and the benefits of SSL.
To address this issue, Wooxy has implemented an automatic SSL certificate generation system for links and images (in case the images are hosted on our side). This mechanism enhances security for both links and hosted images.
The cost of this service is $4.99 per month. To activate this feature, please inform our support team about it when submitting your domain information. Important: Proxying must be disabled for the record.
However, if you prefer to set up SSL certificate generation yourself, you will need to configure receiving requests, certificate installation, and traffic redirection on your side. After that, we will complete the setup on our side, and the link shortener will be ready to use. Important: For this type of HTTPS setup for your shortened links, you must enable proxying for the record you add.
If you still have questions, contact our support team by chat or by emailing us at support@wooxy.com.


