Zapier Integration
Zapier is an online tool that is used to connect hundreds of third party apps and services to Wooxy to automate your marketing strategy.
With this integration you can send triggered Email, SMS, Push and Messenger notifications. Any new contacts created on your landing page, CRM, website, etc (“trigger”) can be automatically synchronized and added to your Wooxy list (“action”), and much more.
Things to know before you start:
- A trigger in Zapier is defined as something that happens in an app that you want to be the start of a Zap’s workflow.
- An action in Zapier is defined as something your Zap does after a trigger occurs.
- IMPORTANT User identificator (userId| email | phoneNumber) is required.
- Log into your Zapier account before you start an integration with the Wooxy platform.
Start your integration
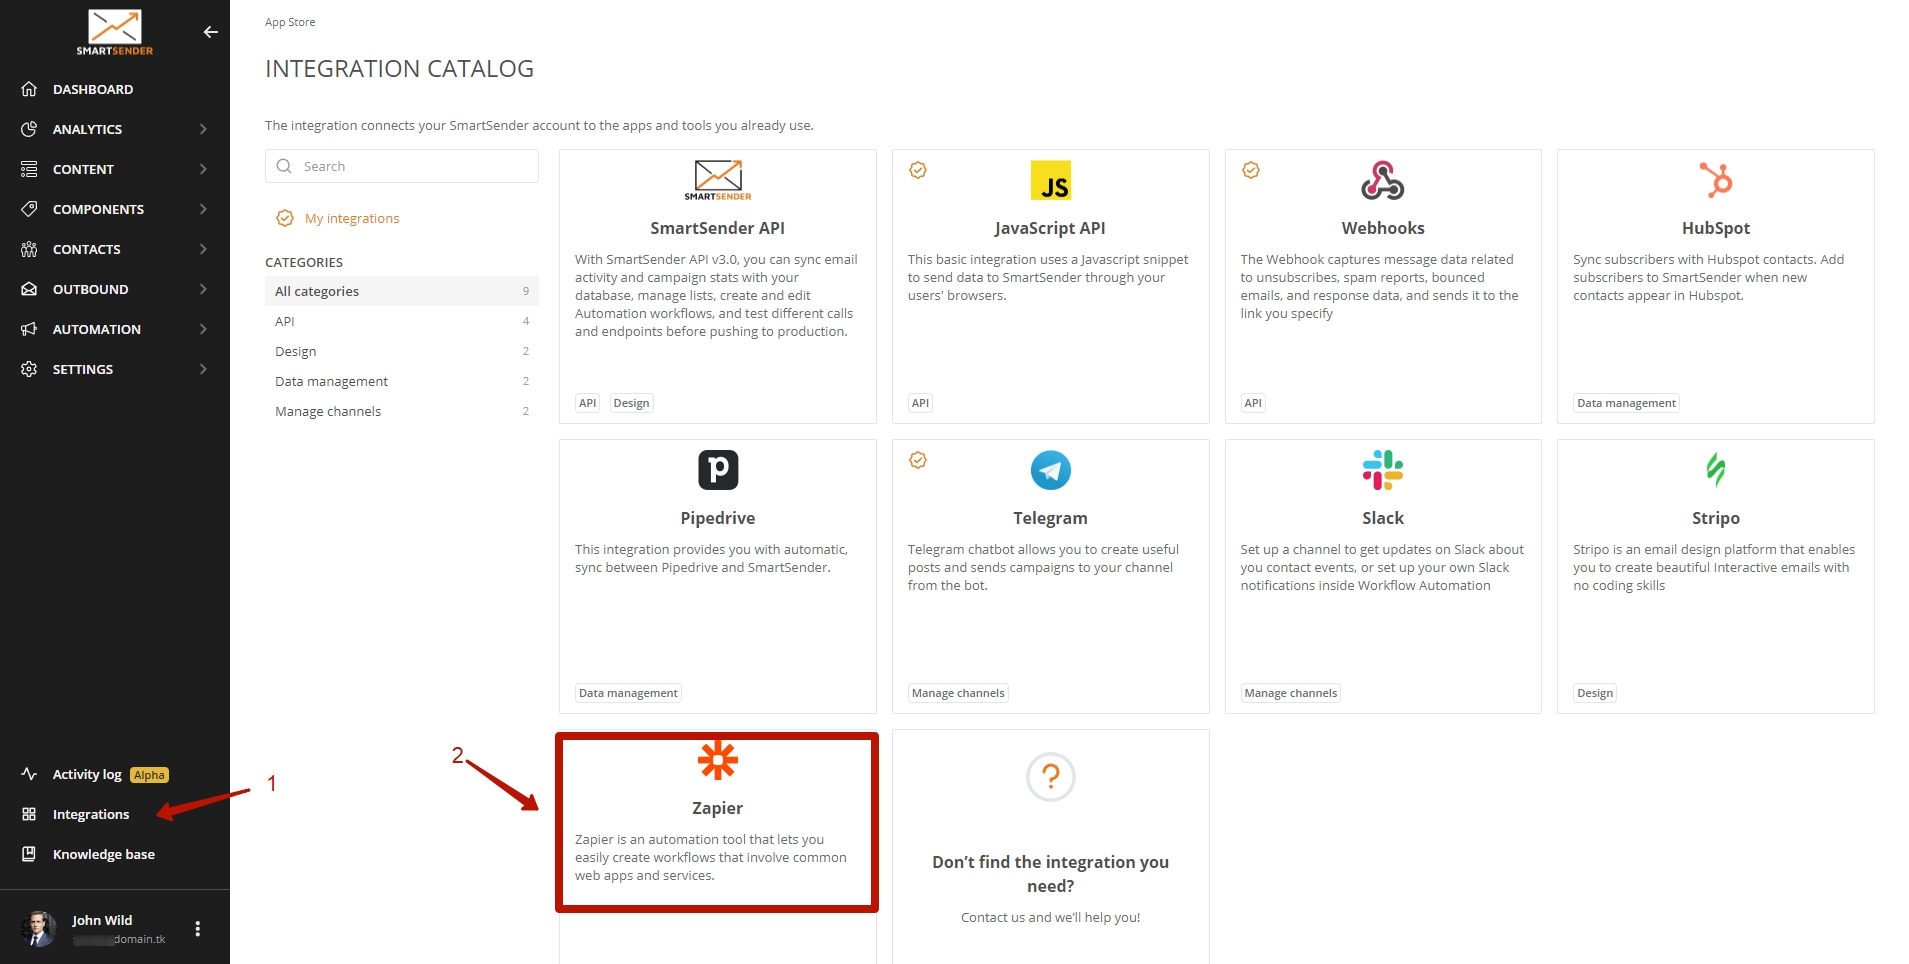
Step-by-step instructions:
Navigate to the Integrations page (Menu -> Integrations).
Select the “Zapier” integration.
Click the “Connect” button. You will be moved to the Zapier platform.
Click on the “Accept invite & Build a Zap” button.
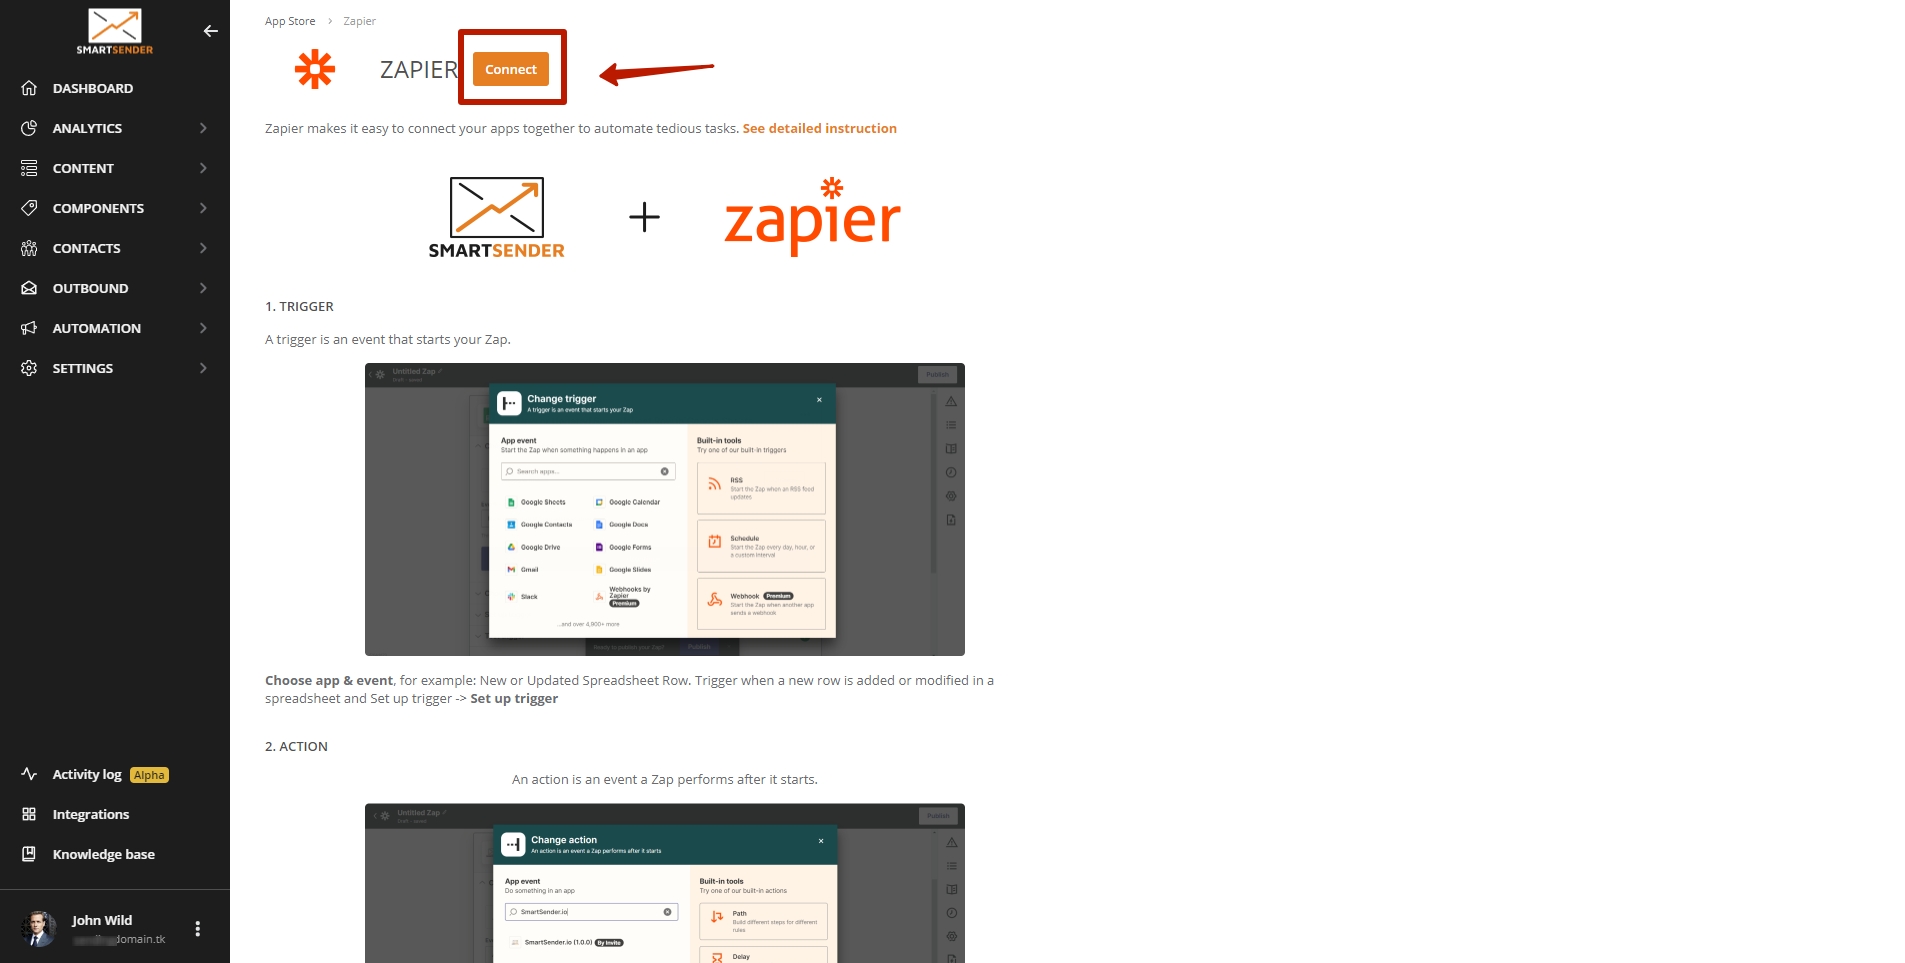
How to set up a Zap
In the example below, we will create a sample Zap that triggers when a new contact is added to a list in Google sheets.
Click the “+Create Zap” button.
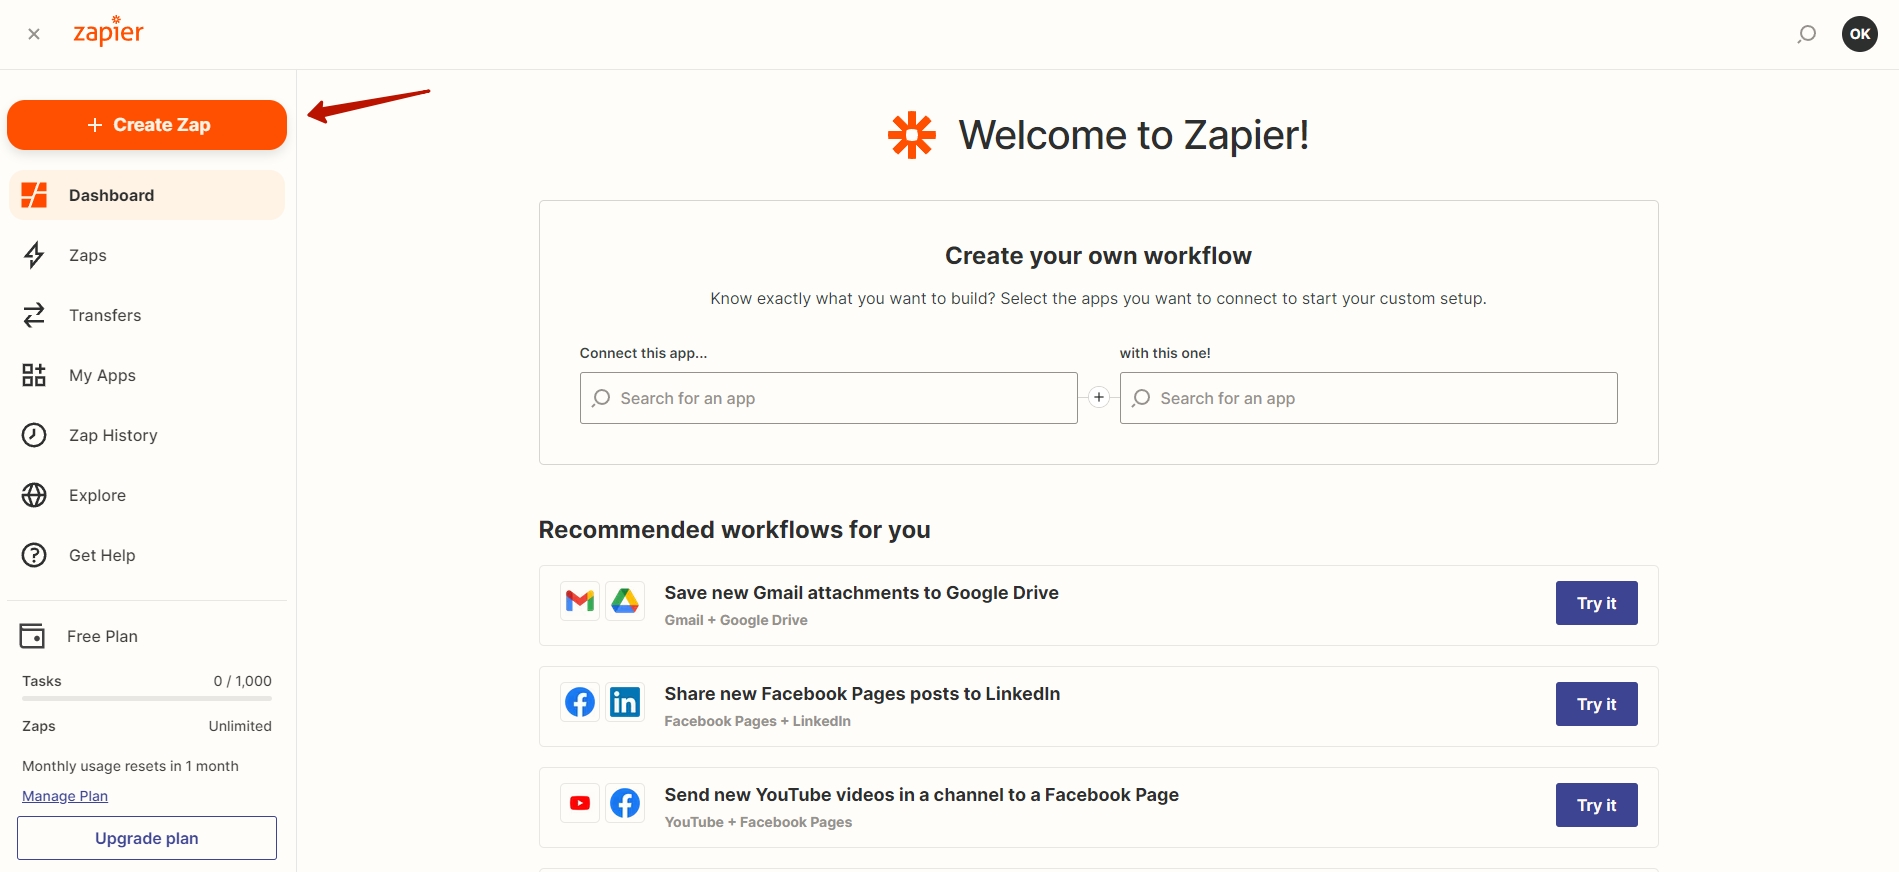
Step 1. Trigger
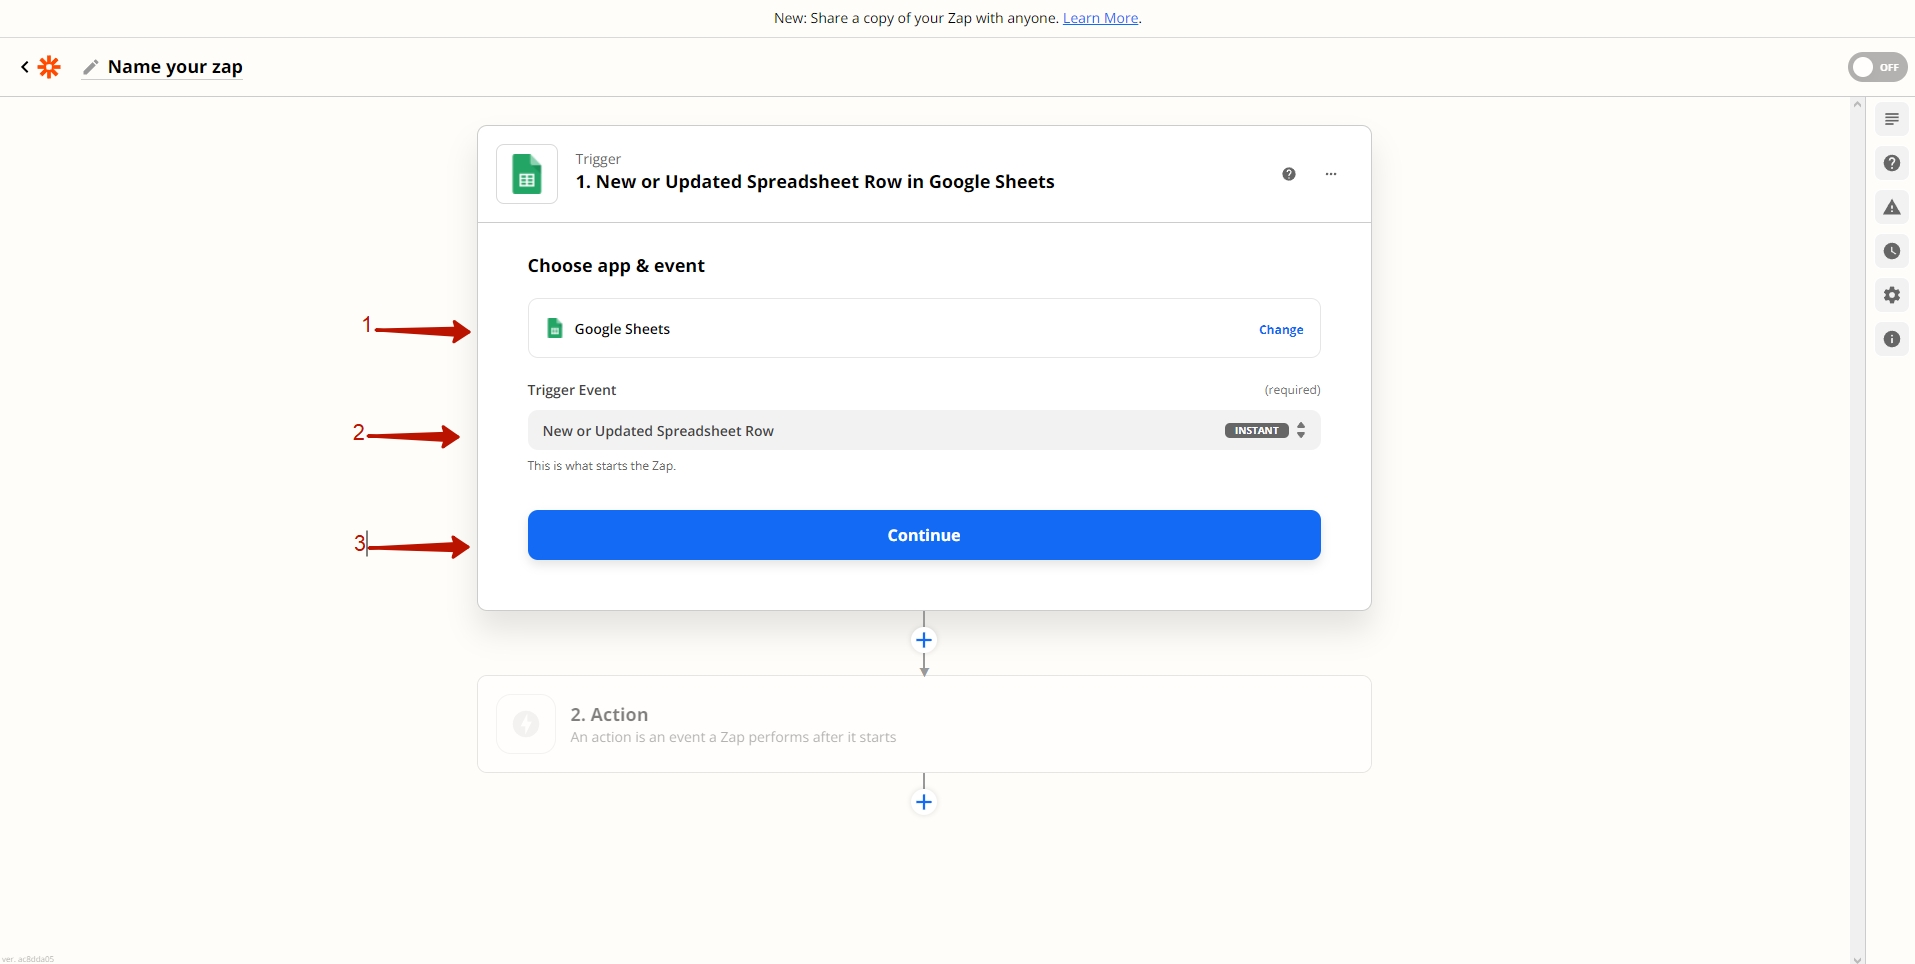
Step-by-step instructions:
Choose an app & event. Click on the Google Sheets option. This will be the trigger for your Zap.
- You can use search to find an app that you need.
Choose the “New or updated spreadsheet row” option.
Click the “Continue” button.
Choose an account.
- If it is necessary log into your account in another service.
Click the “Continue” button.
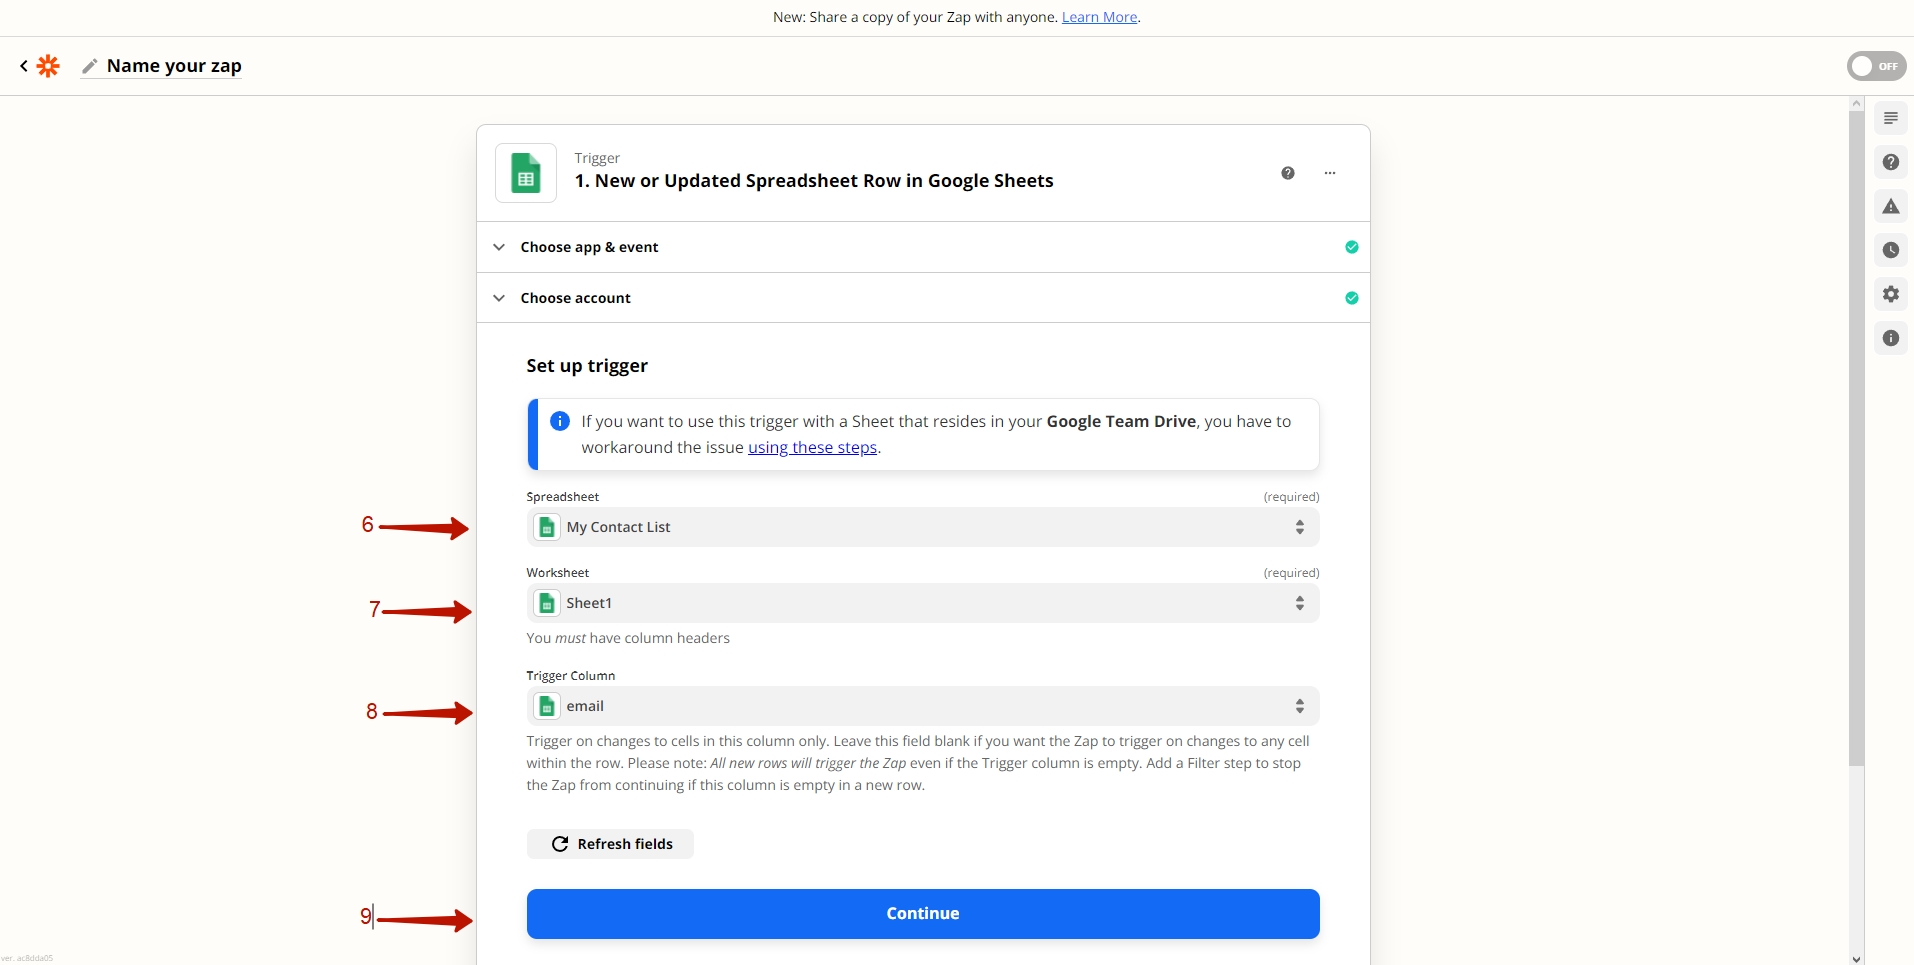
Set up trigger
Choose Spreadsheet.
Choose Worksheet.
Choose Trigger Column.
- Trigger on changes to cells in this column only. Leave this field blank if you want the Zap to trigger on changes to any cell within the row.
- NOTE: All new rows will trigger the Zap even if the Trigger column is empty. Add a Filter step to stop the Zap from continuing if this column is empty in a new row.
Click to continue and Test your trigger.
Step 2. Action
Step-by-step instructions:
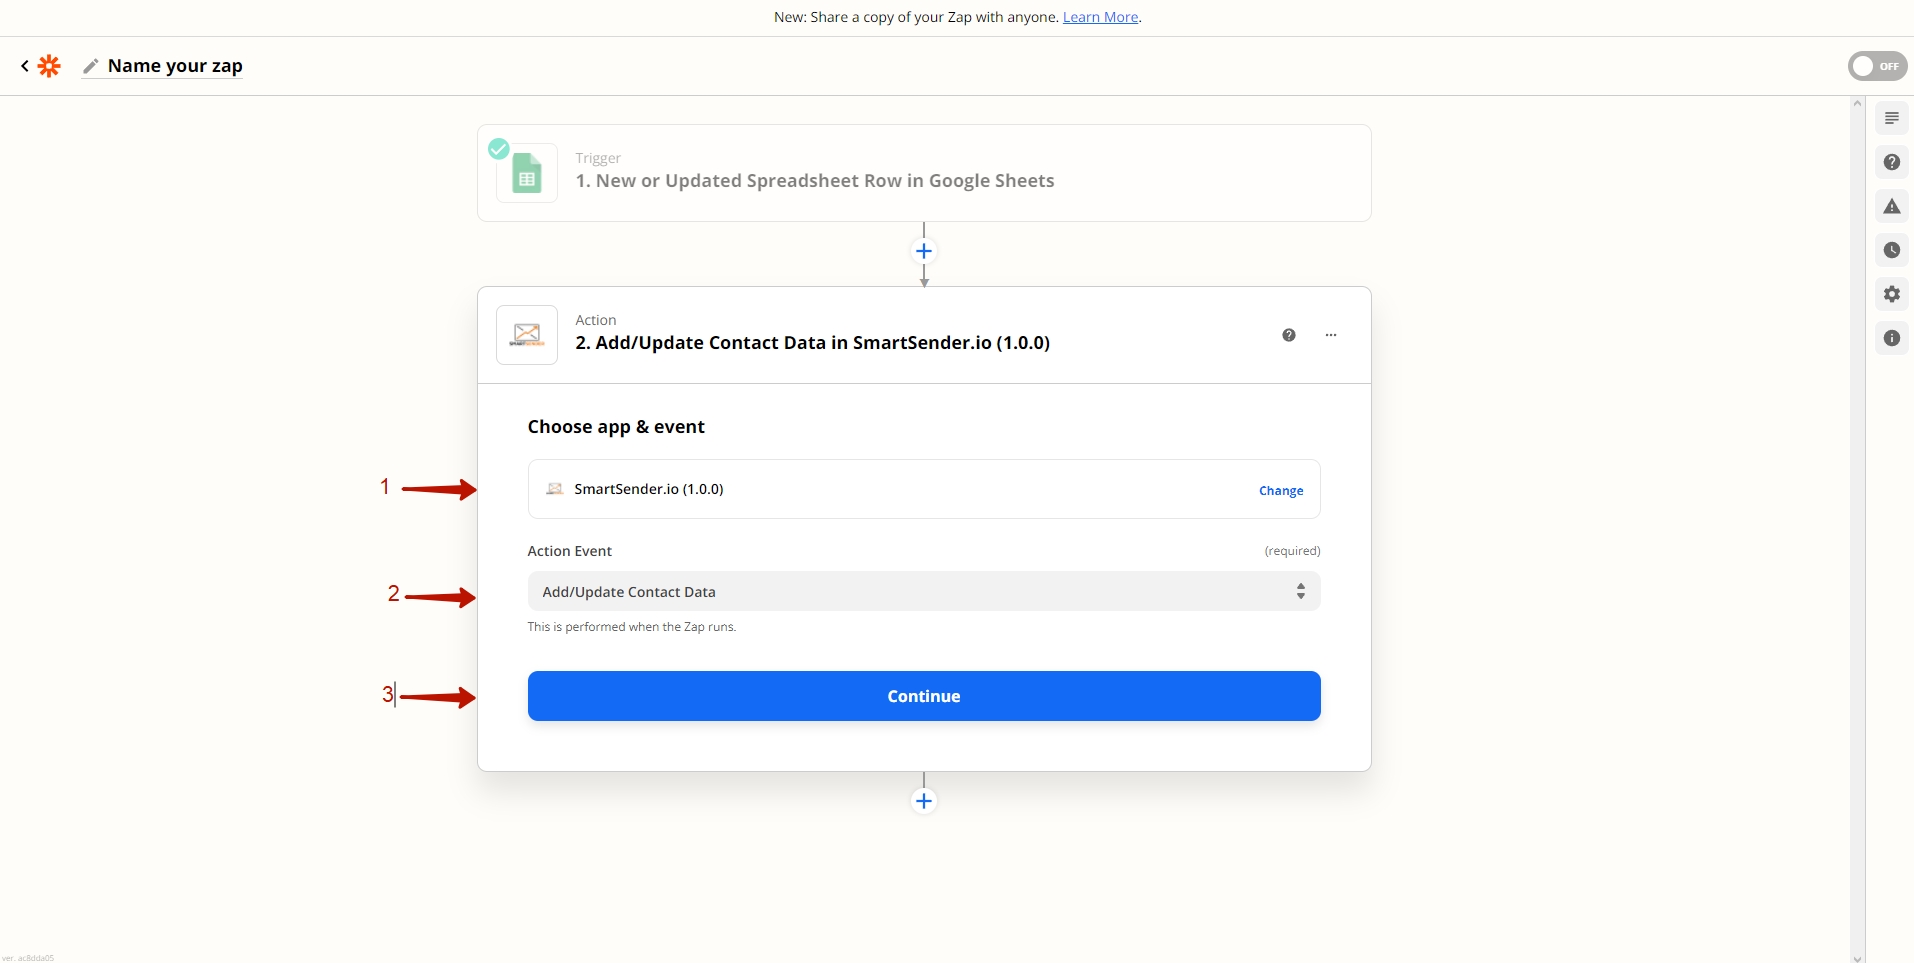
Use the search option to find and connect your Wooxy account.
Choose an Action Event.
- For example: “Add/Update Contact Data”.
Click the “Continue” button.
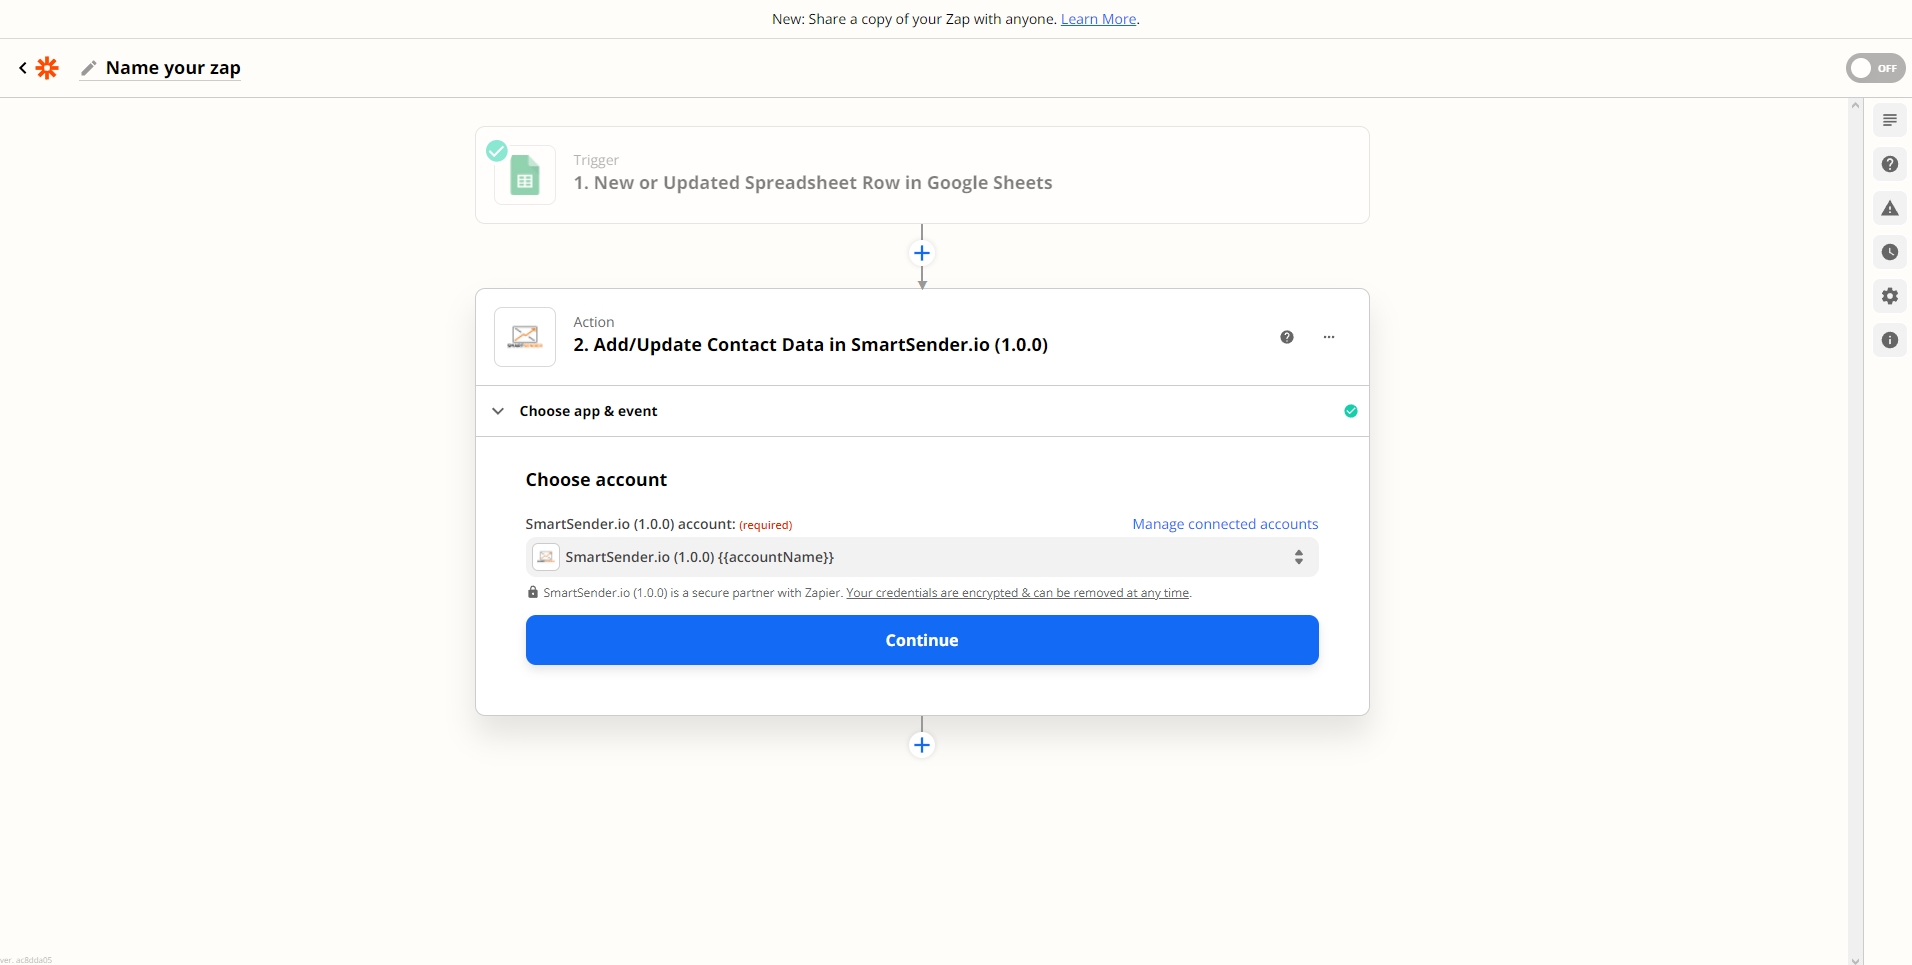
Link your Wooxy account with an API key.
- A modal popup will appear. Paste your Wooxy API Key into the field provided to link the platforms. Then click the “Yes, Continue” button.
- The API Key is personalized. You can find it in your Wooxy account’s settings.
- The Wooxy API credentials will be added to Zapier.
- NOTE: This action is only required when you process the integration for the first time. The Zapier platform will remember all the necessary data.
Click the “Continue” button.
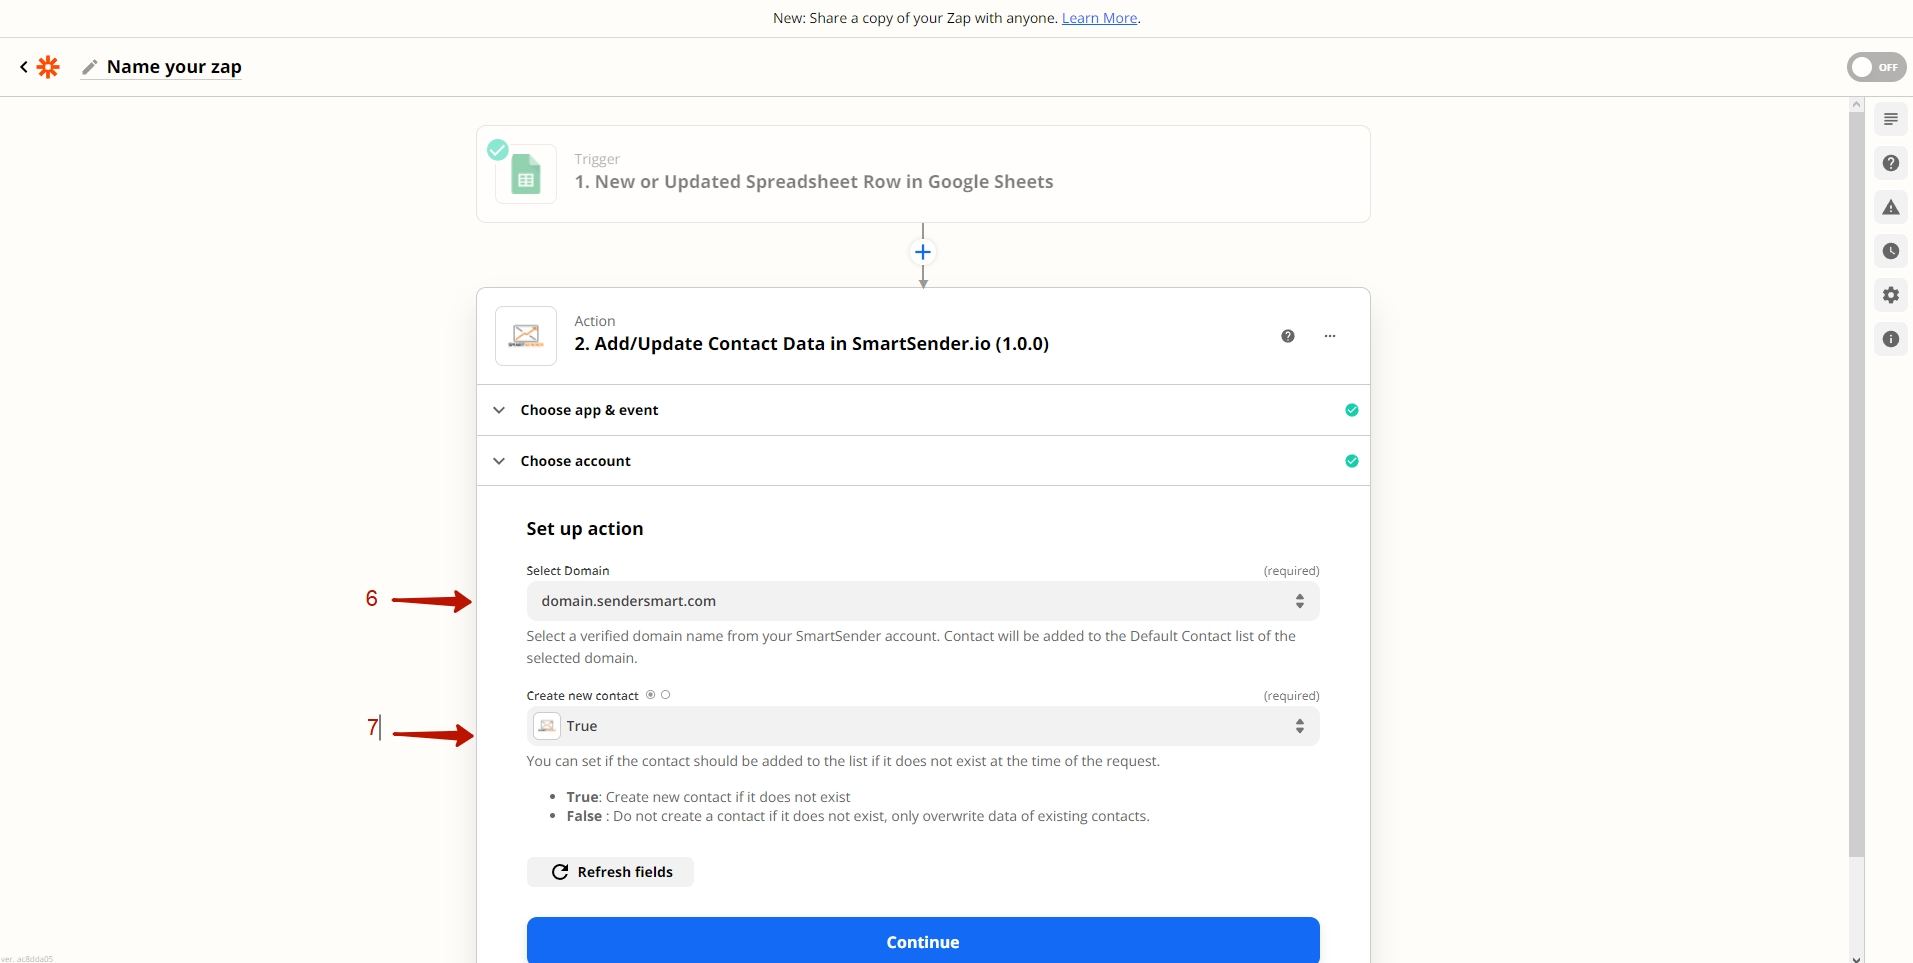
Set up action
Select Domain.
You can set if the contact should be added to the list if it does not exist at the time of the request.
- Contact – The unique user identificator of the contact you want to be updated. IMPORTANT: User identificator ( userId| email | phoneNumber ) is required.
Map fields using the dropdowns provided.
Click the “Continue” button when finished.
Step 3. Publish Zap
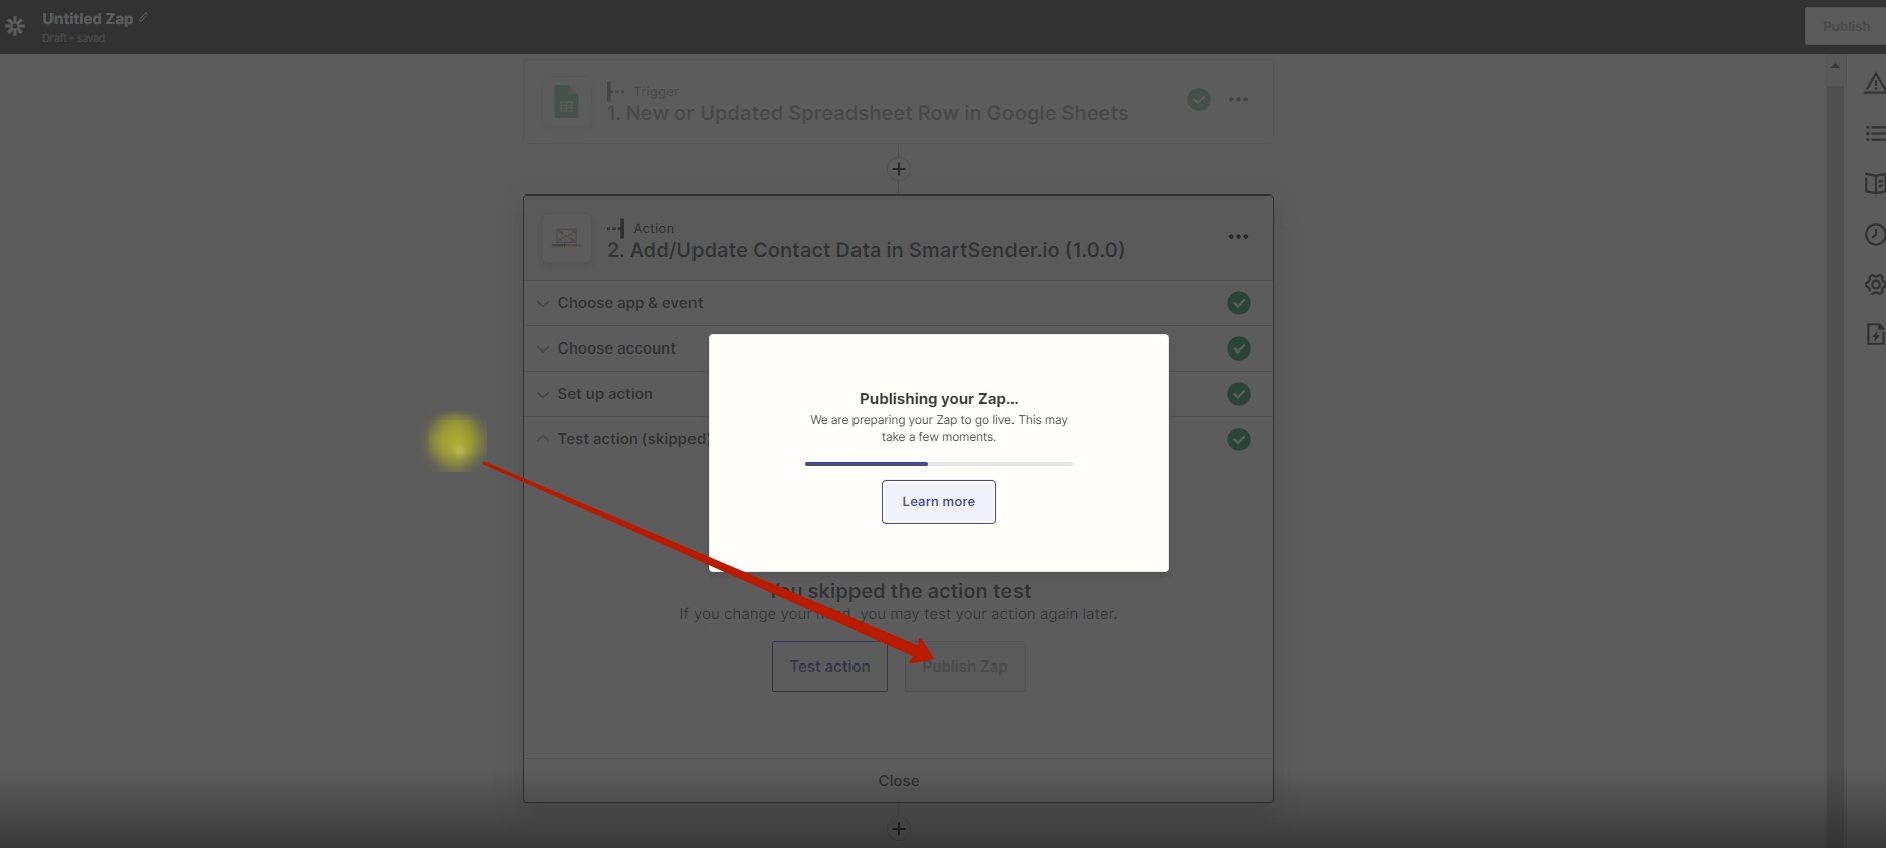
Zapier will prompt you to test the trigger as part of the setup. Click the “Test trigger” button. Once the test is complete, click the “Continue” button.
When finished, click the “Publish Zap” and “Publish & Turn on” buttons.
Supported actions by Wooxy:
| Action | Description |
| Add\Update contact data | Add a contact or update the contact`s data in the Contact List |
| Remove contact | Remove the contact from the Contact List |
| Fire event | Add a new user behavior event to Wooxy |
| Send Email | Send a transactional Email message |
| Send SMS | Send a transactional SMS message |
| Send Telegram message | Send a transactional Telegram message |
| Send WebPush | Send a transactional WebPush message |
| Send triggered Email | Send a new triggered Email with a template saved in your Wooxy account |
| Send triggered SMS | Send a new triggered SMS with a template saved in your Wooxy account |
| Send triggered Telegram message | Send a new triggered Telegram message with a template saved in your Wooxy account |
| Send triggered WebPush | Send a new triggered WebPush notification with a template saved in your Wooxy account |
Ready integrations via Zapier
Wooxy has developed ready-made integration templates for various popular applications via Zapier. These templates already include the necessary data for operation, but the main parameters that may vary need to be specified manually. By setting the required parameters, you can immediately start working and integrate your Wooxy account with many applications via Zapier. Our list of ready-made integrations is continuously growing. If you'd like us to add integrations with specific applications, please contact us at support@wooxy.com.
Important! Both ready-made templates and the templates you create yourself work with our API methods. All the methods you can use to build integrations in Zapier are described above.
Additionally, when using applications integrated through Zapier (like Wix), it's important to verify what data their methods return. Some methods may not provide all the necessary contact information. We strongly recommend testing any new integrations with test contacts before implementing them in your live business environment.
List of Ready-Made Wooxy Integrations via Zapier
| Engage with new leads by sending them communications or responding using pre-prepared templates for interacting with the Facebook app. | |
| Collect new leads, send communication, or trigger an event for the LinkedIn app. | |
| Google Sheets | Work with your contact database from Google Sheets and easily transfer them to your contact lists on the Wooxy platform. |
| WordPress | Receive contacts and manage them from your websites using the WordPress service. |
| Google Forms | Add and manage contacts from Google Forms by adding them to your contact lists, sending them relevant messages, and maintaining ongoing engagement. |
| Stripe | Wooxy has integrated with the Stripe payment service to ensure you stay connected with your contacts and can notify them about various financial communications. |
| Typeform | Manage contacts who complete your forms created on the Typeform service and continue working with them to build long-term communication. |
| Wix | Engage with visitors of your Wix-created websites, gather their contacts into lists, and communicate with them. |
| Salesforce | Manage Salesforce contacts throughout their customer journey to maximize engagement and retention. |
| Gravity Forms> | Add contacts who complete your GravityForms submissions to your contact lists and maintain ongoing communication with them. |


